 Save to Pinterest
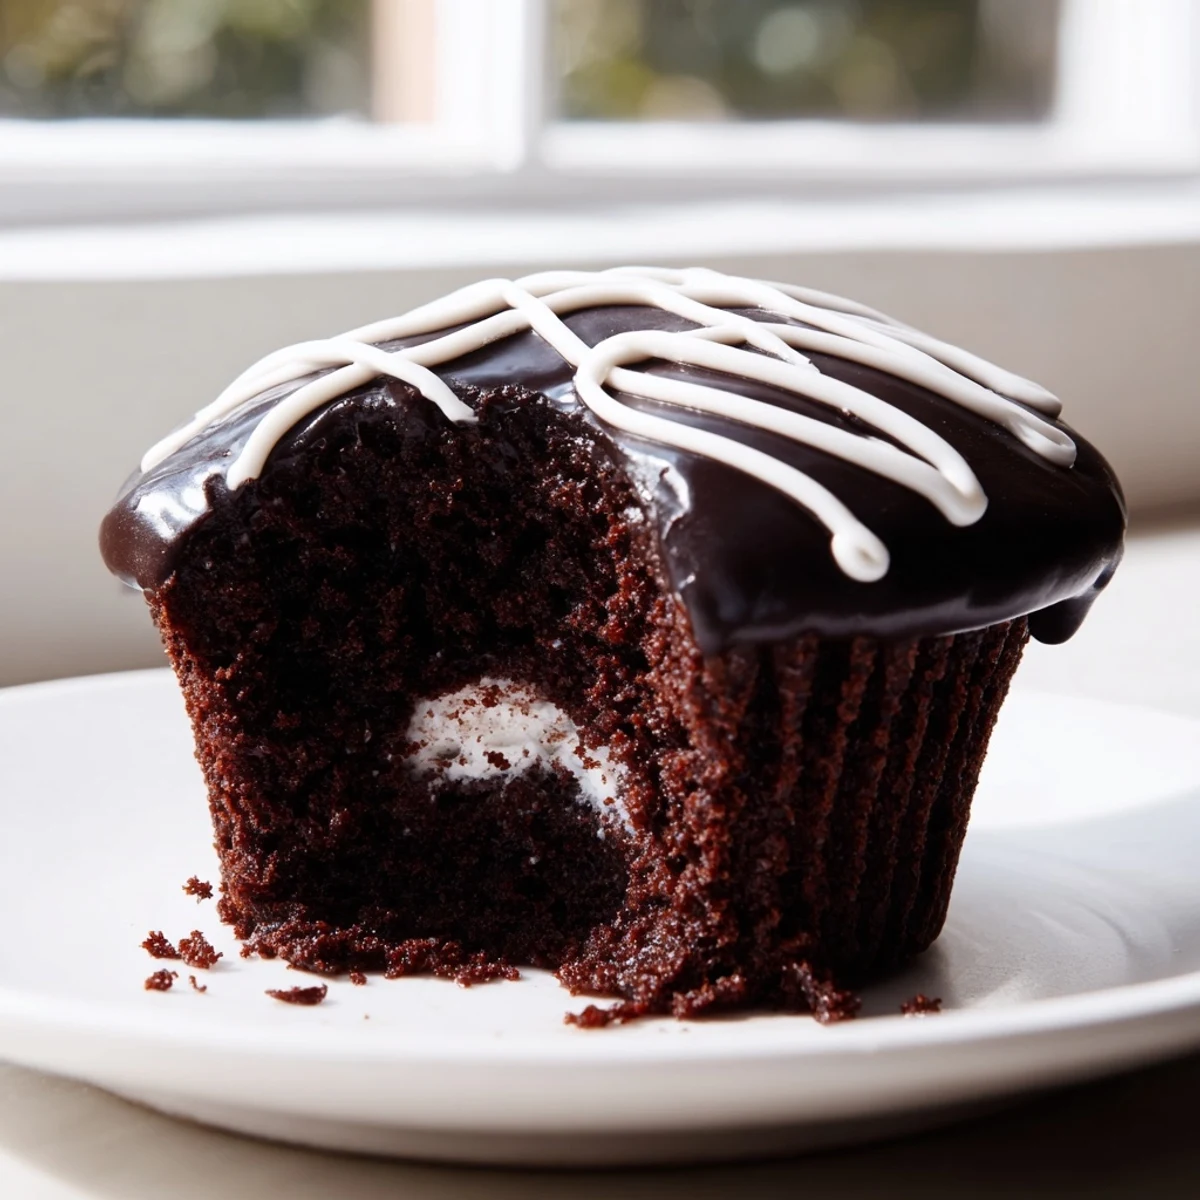
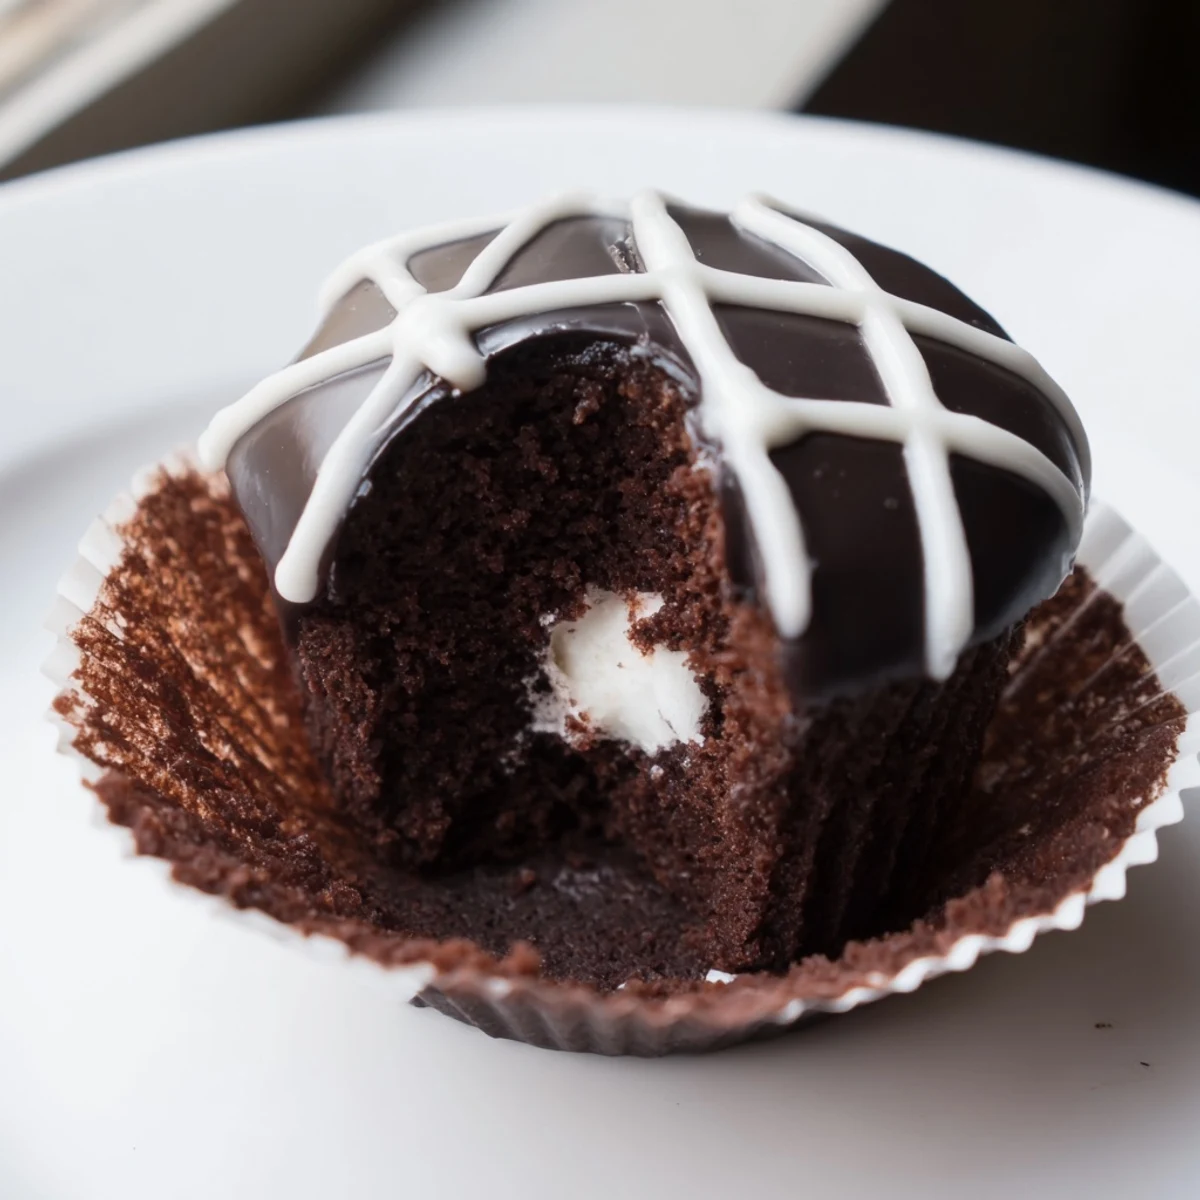
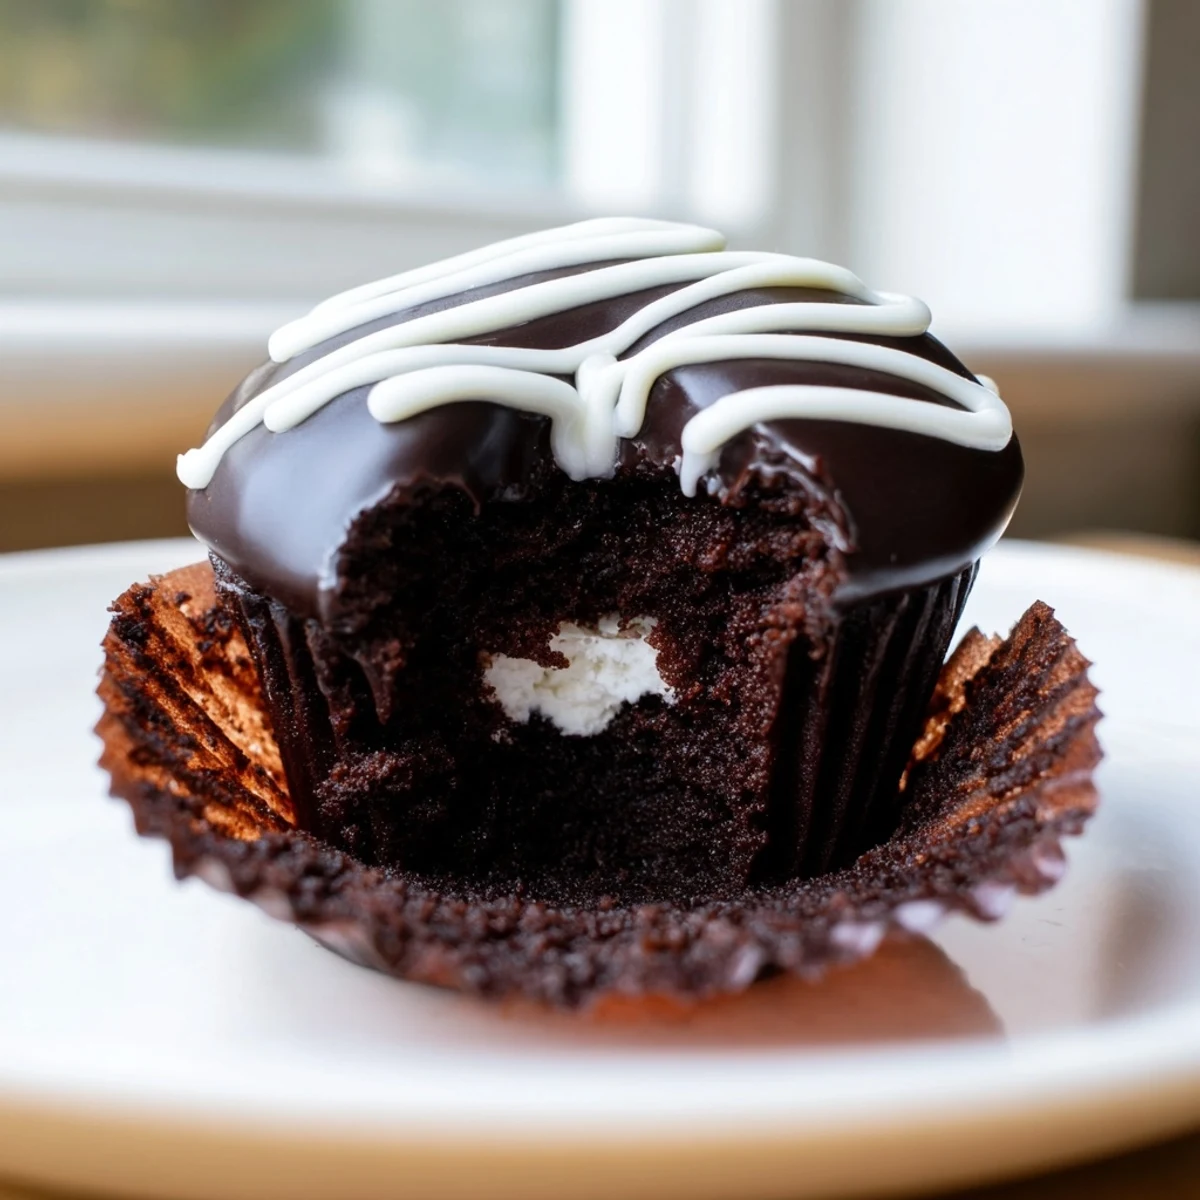
 These homemade Hostess cupcakes capture everything beloved about the iconic store-bought treat. Tender chocolate cake is baked until moist and springy, then injected with a silky marshmallow creme filling that oozes with every bite.
A rich, glossy chocolate ganache cloaks each cupcake in a smooth shell, setting into a slight snap when cooled. The finishing touch is the unmistakable white icing squiggle piped across the top, instantly recognizable and endlessly nostalgic.
While they require a few steps — baking, filling, dipping, and decorating — none of the individual components are difficult. The result is a bakery-worthy dessert that far surpasses anything from a package.
There is something almost magical about cracking open a homemade version of a store bought treat and discovering it tastes ten times better than the original ever did. My kitchen smelled like a chocolate factory the afternoon I first attempted these cupcakes, and my neighbor actually knocked on the door asking what I was baking. The white swirl on top is absurdly fun to pipe, and watching the ganache set into that perfect glossy shell is deeply satisfying. These are the cupcakes that make people gasp when you set the plate down.
I brought a batch of these to a friends birthday picnic last summer, and three people independently asked if I had secretly ordered them from a bakery. One friend sat in the grass quietly eating two in a row without saying a word, which is honestly the highest compliment a baker can receive.
Ingredients
- All purpose flour (1 cup, 120 g): Provides the structure, and sifting it makes a noticeable difference in how tender the crumb turns out.
- Unsweetened cocoa powder (1/2 cup, 45 g): The soul of the chocolate cake base, and Dutch processed will give you an even deeper, richer flavor.
- Baking powder (1 tsp): Gives the cupcakes their gentle lift so they dome beautifully without overflowing.
- Baking soda (1/2 tsp): Works alongside the cocoa and hot water to keep everything light and balanced.
- Salt (1/4 tsp): Just enough to sharpen the chocolate and keep the sweetness honest.
- Unsalted butter, softened (1/2 cup, 115 g for cake; 1/2 cup, 115 g for filling): Room temperature butter creams properly and creates both a tender cake and a silky filling.
- Granulated sugar (1 cup, 200 g): Sweetens the cake while helping build that fluffy texture during creaming.
- Large eggs (2): Bind everything together and add richness to the crumb.
- Vanilla extract (1 tsp for cake; 1 tsp for filling): Use the real stuff here because it shines in both the cake and the marshmallow center.
- Whole milk (1/2 cup, 120 ml for cake; 1 tsp for icing): Adds moisture and a bit of fat that keeps everything soft.
- Hot water (1/2 cup, 120 ml): Blooms the cocoa powder and thins the batter just enough for that perfect, even bake.
- Powdered sugar (1 cup, 120 g for filling; 1/4 cup, 30 g for swirl): Dissolves smoothly into both the filling and the decorative icing without any graininess.
- Marshmallow creme (1 cup, 100 g): The secret to that stretchy, sweet center that makes these unmistakably a Hostess homage.
- Heavy cream (1/2 cup, 120 ml): Creates the luxurious ganache that sets into a shiny, snappy topping.
- Semi sweet chocolate, chopped (4 oz, 115 g): Melts into the cream for a ganache that is rich but not cloying.
Instructions
- Get your oven ready:
- Preheat to 350 degrees F (175 degrees C) and line a 12 cup muffin tin with paper liners so nothing sticks.
- Whisk the dry team:
- Sift the flour, cocoa powder, baking powder, baking soda, and salt together in a bowl until evenly blended and no lumps remain.
- Cream butter and sugar:
- Beat the softened butter and granulated sugar in a large bowl until the mixture turns pale, light, and fluffy, which usually takes about three minutes with an electric mixer.
- Add eggs and vanilla:
- Drop in the eggs one at a time, mixing well after each addition, then stir in the vanilla until everything looks cohesive and smooth.
- Build the batter:
- Add the flour mixture in three parts, alternating with the milk, mixing just until each addition disappears, then stir in the hot water until the batter is glossy and pourable.
- Bake and cool:
- Divide the batter evenly among the liners and bake 18 to 20 minutes until a toothpick comes out clean, then let them cool completely before filling.
- Make the marshmallow filling:
- Beat the butter and powdered sugar until fluffy, then fold in the marshmallow creme and vanilla until you have a silky, pipeable filling that tastes like pure joy.
- Fill the cupcakes:
- Transfer the filling to a piping bag with a small round tip, insert the tip into the center of each cupcake, and squeeze gently until you feel a slight resistance, saving a little filling for the swirl if you like.
- Prepare the ganache:
- Heat the cream until it steams, pour it over the chopped chocolate, wait two minutes, then stir until glossy and smooth before letting it cool for five minutes.
- Dip and set:
- Dip the top of each filled cupcake into the ganache, let the excess drip off, and allow them to set for about ten minutes until the surface is no longer tacky.
- Pipe the iconic swirl:
- Mix the powdered sugar and milk into a thick but pipeable icing, load it into a small piping bag, and draw the classic squiggly lines across each cupcake top.
 Save to Pinterest
 The moment my daughter carefully peeled back the liner, saw the white filling peeking out, and whispered that I was officially the best baker in the world, this recipe stopped being just a dessert and became a family memory I will carry forever.
Storing and Making Ahead
You can bake the cupcakes a day in advance and keep them in an airtight container at room temperature, but wait to fill and dip them until the day you plan to serve. Once assembled, they hold up beautifully for up to three days covered on the counter, though in my house they never last that long.
Tools That Make This Easier
An electric mixer saves your arm during creaming and whips the filling into something impossibly light, but a sturdy whisk and determination will get you there too. A piping bag with a small round tip is essential for getting that marshmallow filling cleanly into the center without tearing the cake apart.
Getting the Ganache Right
The ganache is where patience truly matters because if you dip while it is too warm, it slides right off, and if it is too cool, you get a thick, uneven shell. Heat the cream until it just starts to steam, never boiling, and let it sit on the chocolate undisturbed for the full two minutes before stirring.
- Stir the ganache starting from the center and working outward for the smoothest result.
- If the ganache firms up too much while dipping, microwave it for five seconds to loosen it.
- Always dip rather than spread to keep that perfect, shiny dome shape.
 Save to Pinterest
 These cupcakes are a labor of love that reward every minute you spend on them, and watching someone bite into the marshmallow center for the first time is pure, contagious delight.
Recipe FAQs
- → How do I get the filling inside the cupcakes?
-
Use a piping bag fitted with a small round tip. Insert the tip directly into the center of each cooled cupcake top and gently squeeze about one tablespoon of filling inside. You will feel the cupcake slightly expand as it fills.
- → Can I make these cupcakes ahead of time?
-
Yes, the chocolate cupcakes can be baked a day in advance and stored in an airtight container. Fill and dip them in ganache on the day you plan to serve for the freshest texture and appearance.
- → What type of cocoa powder works best?
-
Natural unsweetened cocoa powder works perfectly for the batter. For a deeper, richer chocolate flavor, Dutch-processed cocoa powder is an excellent alternative that adds a more intense color and smoother taste.
- → How should I store finished cupcakes?
-
Store them covered at room temperature for up to three days. Avoid refrigerating as this can dry out the cake and cause the ganache to lose its glossy finish. If your kitchen is very warm, a cool spot away from direct sunlight is ideal.
- → Can I use a different filling?
-
Absolutely. While marshmallow creme delivers the classic Hostess experience, you can substitute vanilla buttercream, whipped cream filling, or even a fruit-based filling like strawberry jam for a fun variation.
- → Why does the batter include hot water?
-
Hot water blooms the cocoa powder, intensifying its chocolate flavor and helping it dissolve evenly throughout the batter. This technique also keeps the crumb especially tender and moist.
