 Save to Pinterest
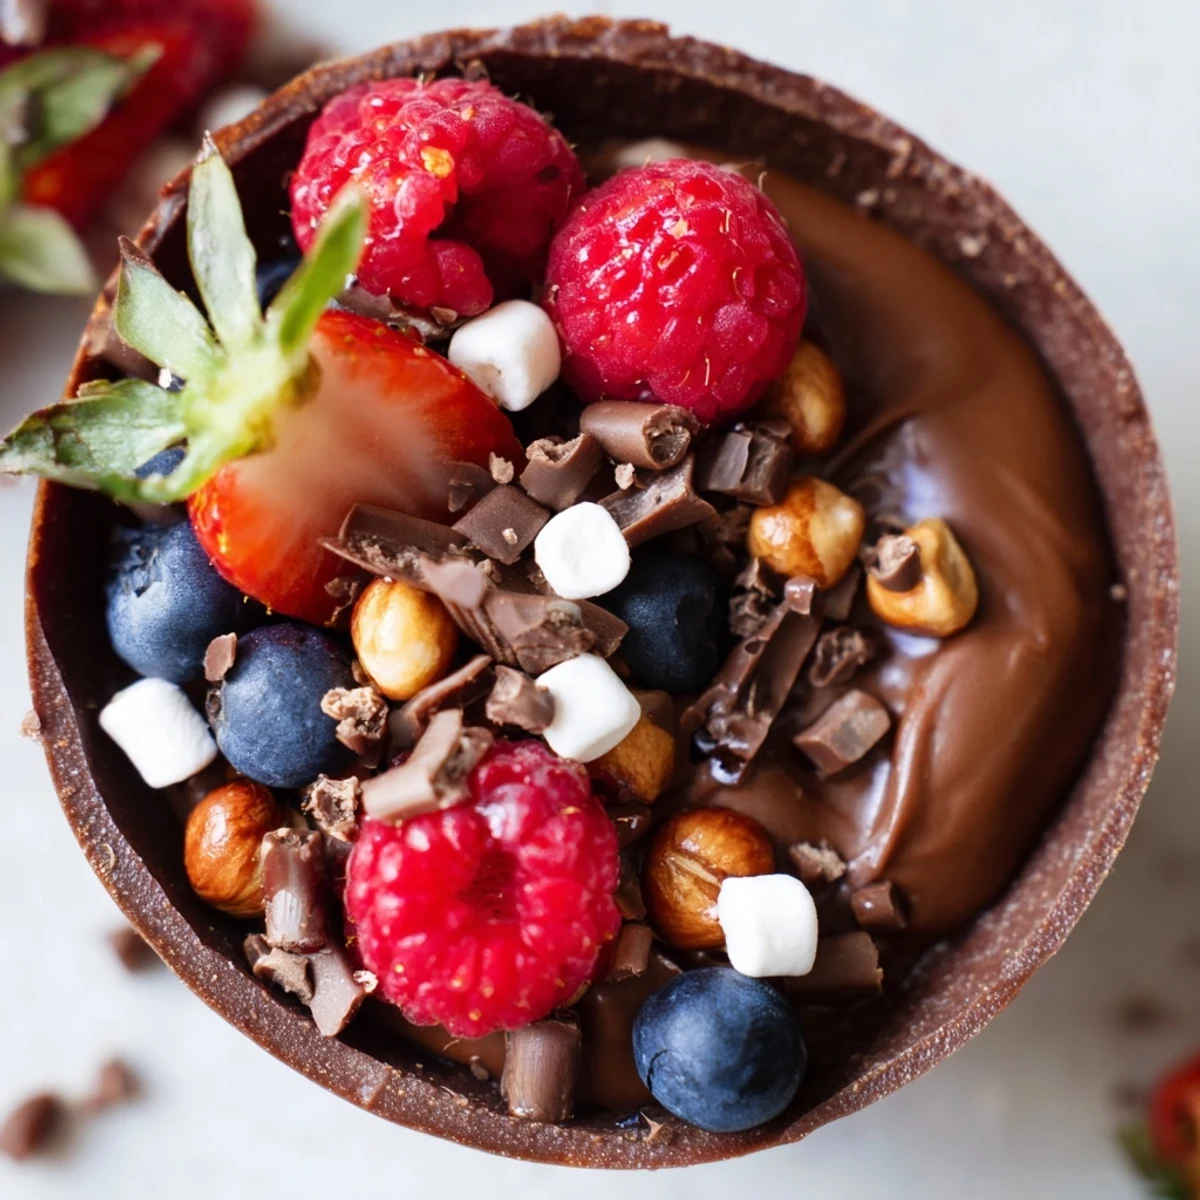
 Create stunning chocolate grazing cups featuring handmade dark chocolate vessels filled with silky chocolate mousse. These elegant individual desserts showcase layers of velvety cream, vibrant fresh berries, and artisanal toppings like toasted nuts, marshmallows, and chocolate curls. Perfect for dinner parties, celebrations, or whenever you crave something indulgent and visually impressive.
The first time I attempted chocolate cups, they collapsed into a sad puddle within minutes. I learned the hard way that patience is everything when working with tempered chocolate and that thin, even layers make all the difference between an elegant dessert and a kitchen disaster.
I made these for my sisters bridal shower last spring, arranging all the toppings in beautiful bowls so everyone could build their own masterpiece. The way friends debated whether marshmallows belonged on a dessert chocolate cups became the funniest debate of the afternoon.
Ingredients
- 200 g dark chocolate (at least 60% cocoa), chopped: Higher cocoa percentage means the cups will hold their shape better at room temperature and the flavor will be more sophisticated
- 200 ml heavy cream: Must be very cold before whipping, so pop it in the freezer for 10 minutes if your kitchen runs warm
- 100 g dark chocolate, chopped: This will melt into the whipped cream, so choose something you genuinely love eating straight
- 2 tbsp powdered sugar: Dissolves instantly into cold cream without leaving grainy spots like granulated sugar might
- 1 tsp vanilla extract: Pure vanilla makes the chocolate taste deeper and more complex, never skip this
- 1 cup fresh mixed berries: The tartness cuts through all that rich chocolate, creating that perfect sweet and tangy balance
- 2 tbsp chopped nuts: Toast them lightly in a dry pan first for an incredible nutty aroma that will make everyone ask what you did differently
- 2 tbsp mini marshmallows: These add playful texture and a bit of nostalgia that somehow makes the dessert feel less serious
- 2 tbsp chocolate curls or shavings: Use a vegetable peeler on room temperature chocolate for professional looking curls
- 1 tbsp edible gold leaf or pearls (optional): These tiny touches make the whole presentation feel absolutely luxurious
Instructions
- Craft the chocolate cups:
- Melt the chocolate in short bursts, stirring between each to prevent seizing. Paint the inside of your cupcake liners in thin, even layers, paying extra attention to the bottom corners where chocolate tends to pool too thickly.
- Set the cups properly:
- Chill for exactly 20 minutes, then test if the chocolate has fully released from the liner. If it is still soft, give it another 5 to 10 minutes before attempting to peel away the liner.
- Prepare the mousse base:
- Melt the second amount of chocolate until it is smooth and glossy. Let it cool until it is barely warm to the touch, otherwise it will deflate your whipped cream instantly.
- Whip the cream:
- Beat the cold cream until it holds soft peaks that droop slightly when you lift the whisk. Add the sugar and vanilla, then continue whipping just until it holds its shape without feeling stiff.
- Combine gently:
- Stir a big dollop of whipped cream into the melted chocolate first, then fold this lighter mixture back into the remaining cream. Use sweeping motions and stop as soon as no white streaks remain.
- Fill the cups:
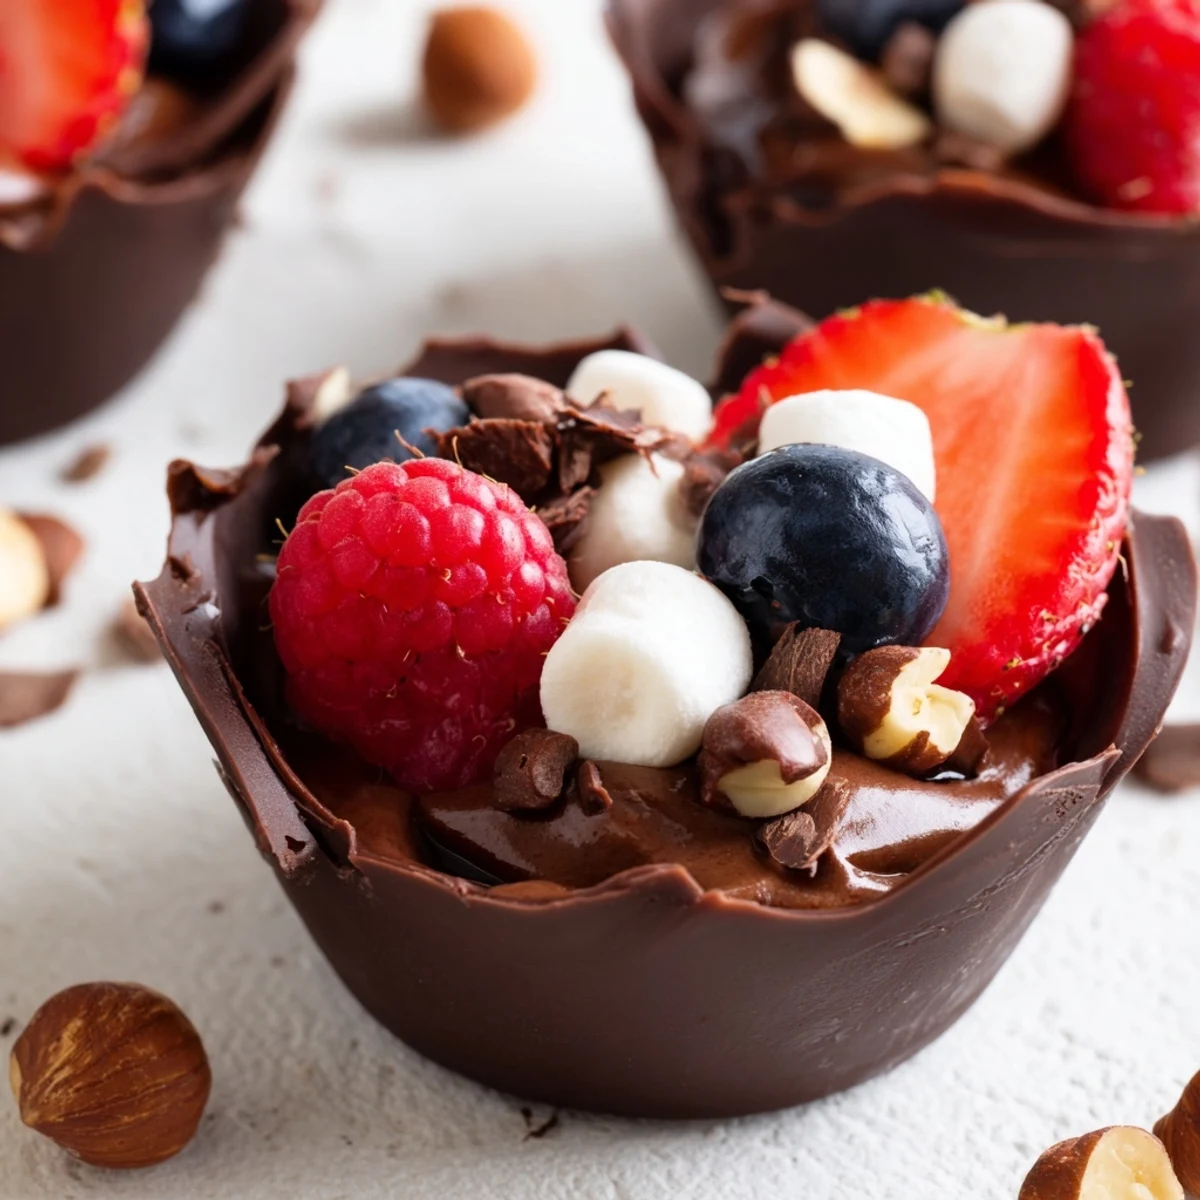
- Spoon or pipe the mousse into each chocolate cup, stopping about two thirds up the sides. The mousse will puff slightly as it chills, so leave room for the toppings.
- Add the finishing touches:
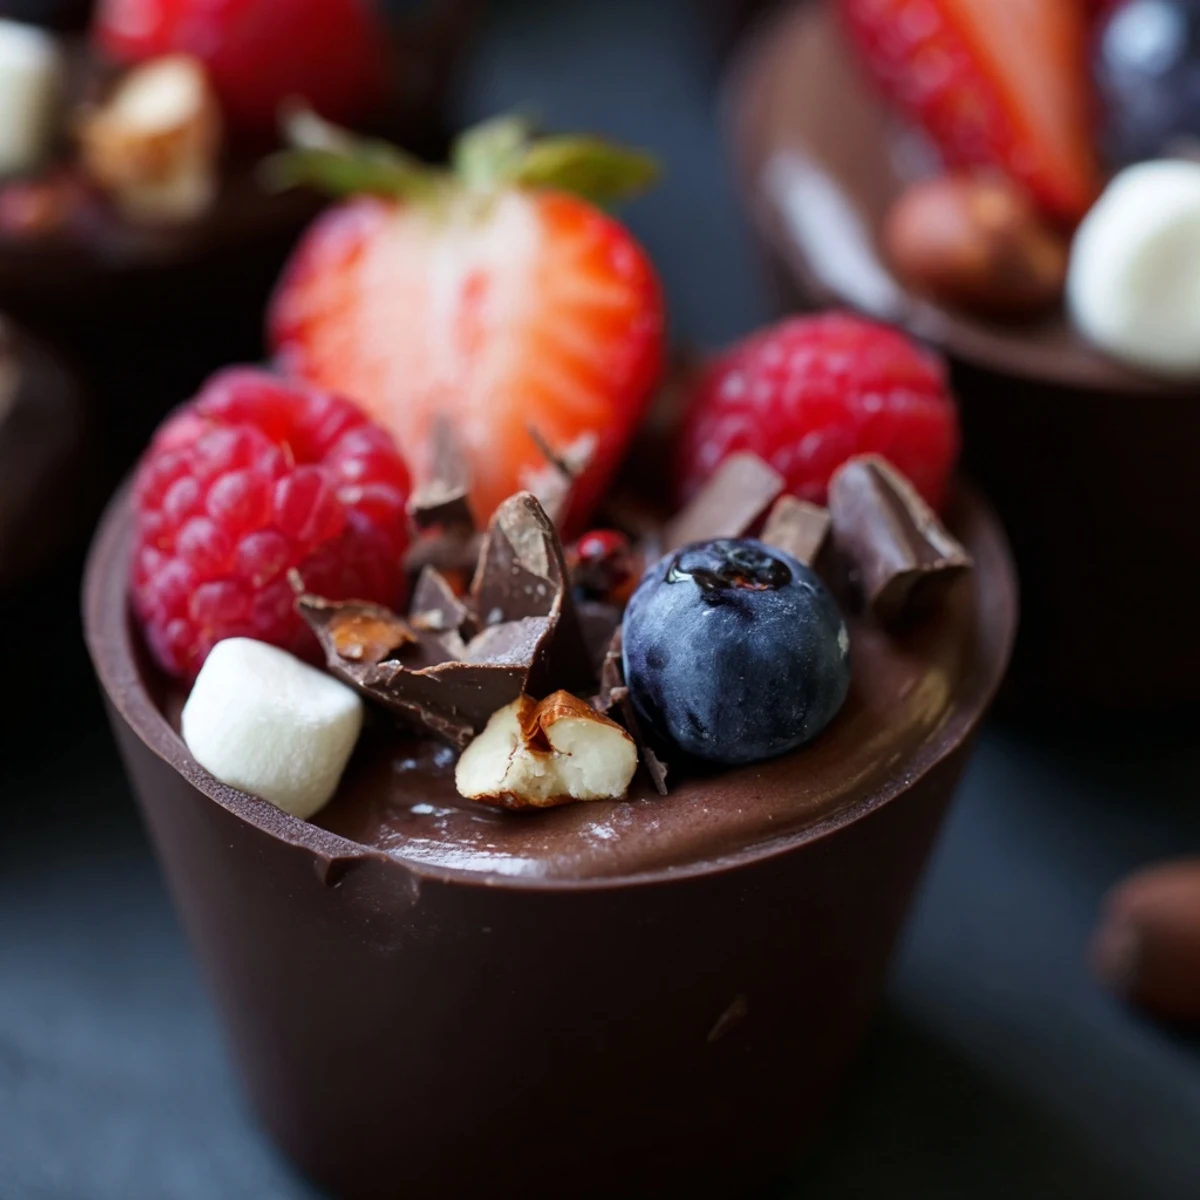
- Pile on the berries, nuts, marshmallows, and chocolate curls right before serving. Add gold leaf last as a final elegant touch that catches the light beautifully.
- Final chill:
- Refrigerate the assembled cups for at least 20 minutes so the mousse sets properly and the flavors meld together. Serve them cold but not rock hard.
 Save to Pinterest
 These became my go to dessert after my friend accidentally sat on one during a party and declared it the most delicious mistake ever. Now everyone asks for the recipe that includes actual chocolate cups you can eat.
Making The Cups Ahead
I once made the chocolate cups three days in advance, stored them between layers of parchment paper in an airtight container, and they stayed perfectly crisp. The mousse is best made the same day though, since it loses that ethereal lightness after about 24 hours in the refrigerator.
Customizing The Toppings
My daughter started adding crushed pretzels and potato chips for a salty crunch that people either love or find completely bizarre. The most unexpected winning combination was actually raspberry sauce drizzled over the marshmallows.
Troubleshooting Common Issues
If your chocolate cups crack when removing the liners, the chocolate was either too thick or chilled too quickly. For the mousse, if it does not set up properly, the cream was likely under whipped or the chocolate was too warm when folded in.
- Work in a cool room or the chocolate will never set properly
- Use silicone liners for easier release than paper ones
- Keep whipped cream over ice if your kitchen is particularly warm
 Save to Pinterest
 Watch people is faces when they realize they get to eat the entire cup, chocolate wrapper and all. That moment of delighted realization never gets old.
Recipe FAQs
- → Can I make these chocolate cups ahead of time?
-
Yes, prepare the chocolate cups up to 2 days in advance. Store them in an airtight container at room temperature with parchment paper between layers. Fill with mousse and toppings within 4-6 hours of serving for optimal texture and freshness.
- → What's the best way to melt chocolate for the cups?
-
Use a double boiler for gentle, even heating, melting 60% dark chocolate slowly while stirring constantly. Alternatively, microwave in 20-second intervals, stirring between each burst. Avoid overheating as chocolate can seize and become grainy.
- → Can I use white chocolate instead of dark?
-
Absolutely! White chocolate works beautifully for both cups and mousse, creating a stunning contrast with colorful berries. Note that white chocolate melts faster, so reduce heating time and work quickly when coating the liners.
- → How do I prevent the chocolate cups from cracking?
-
Ensure your chocolate is properly tempered and the coating is thick enough—at least 1/8 inch. Chill thoroughly before removing liners. Handle gently and store at cool room temperature, avoiding direct sunlight or warm environments.
- → What other toppings can I use?
-
Get creative with seasonal fruits, crushed cookies, pretzels for saltiness, shredded coconut, candied citrus, or edible flowers. For adults, consider adding a splash of liqueur to the mousse or topping with gold leaf for extra elegance.
- → Can I make these without cupcake liners?
-
Use silicone molds, small glass bowls, or even inflated water balloons coated with chocolate. For a rustic look, create freeform chocolate nests by drizzling melted chocolate onto parchment in circular patterns and chilling until set.
