 Save to Pinterest
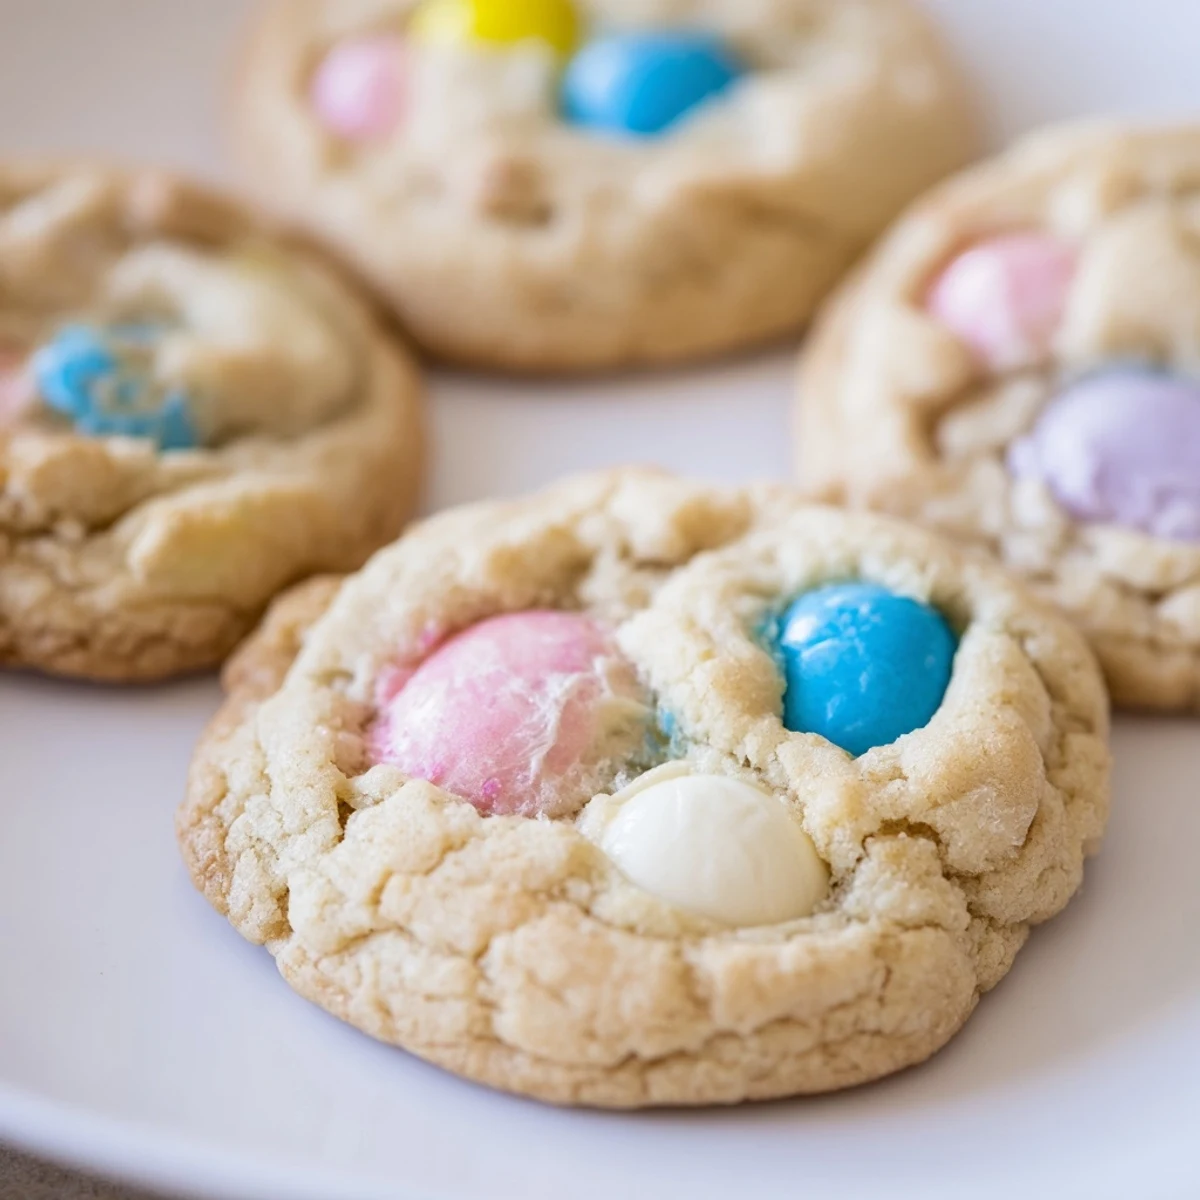
 Create the most adorable Easter treats with these soft, chewy bunny-shaped cookies packed with colorful chocolate candies. The dough combines classic cookie fundamentals with festive M&M chocolates, resulting in perfectly textured treats that capture the joy of spring celebrations. Each bite delivers a satisfying chewiness with bursts of chocolate sweetness, while the playful bunny shape brings instant charm to any dessert table.
The preparation comes together in just 30 minutes, making these ideal for last-minute holiday baking or spontaneous family fun in the kitchen. The dough balances traditional cookie base ingredients with premium chocolate add-ins, while optional white chocolate chips add creamy depth. For extra chewiness, simply chill the dough briefly before baking—this small step elevates the texture remarkably.
Customization opportunities abound: swap the white chocolate for chopped nuts, add pastel sprinkles for extra sparkle, or decorate with edible bunny eyes and marshmallow tails. These cookies bake quickly at 350°F, emerging with perfectly set edges and delightfully soft centers. Let them cool briefly on the baking sheet to set before transferring—the patience pays off in texture. Store in an airtight container to maintain that irresistible softness for days.
Last Easter, my four-year-old niece discovered that if she arranged the M&Ms just right, she could make cookie bunnies with rainbow eyes. We spent the entire afternoon covered in flour and chocolate, and honestly, those slightly lopsided, colorful cookies tasted better than anything I've ever made in a pristine kitchen. Something about the chaos made them sweeter.
I brought these to a neighborhood egg hunt last spring, and within fifteen minutes, parents were casually asking where I'd bought them. Watching kids' faces light up when they spotted the bunny toppings was worth every minute of prep time. Someone actually told me they were too pretty to eat, then proceeded to eat three.
Ingredients
- 2 1/4 cups (280 g) all-purpose flour: I learned the hard way that spooning and leveling makes these cookies perfectly tender instead of dense
- 1/2 teaspoon baking soda: This small amount gives just the right lift for that pillowy soft texture we want
- 1/2 teaspoon salt: Don't skip this, it balances the sweetness and makes the chocolate flavors pop
- 3/4 cup (170 g) unsalted butter, softened: Room temperature butter incorporates beautifully, creating those chewy edges we all love
- 1 cup (200 g) light brown sugar, packed: The molasses in brown sugar creates moisture and that gorgeous golden color
- 1/2 cup (100 g) granulated sugar: This combination of sugars gives us crispy edges and soft centers
- 2 large eggs: Bring these to room temperature too, they'll emulsify better with the butter
- 2 teaspoons pure vanilla extract: I double the vanilla sometimes because that aromatic warmth is everything
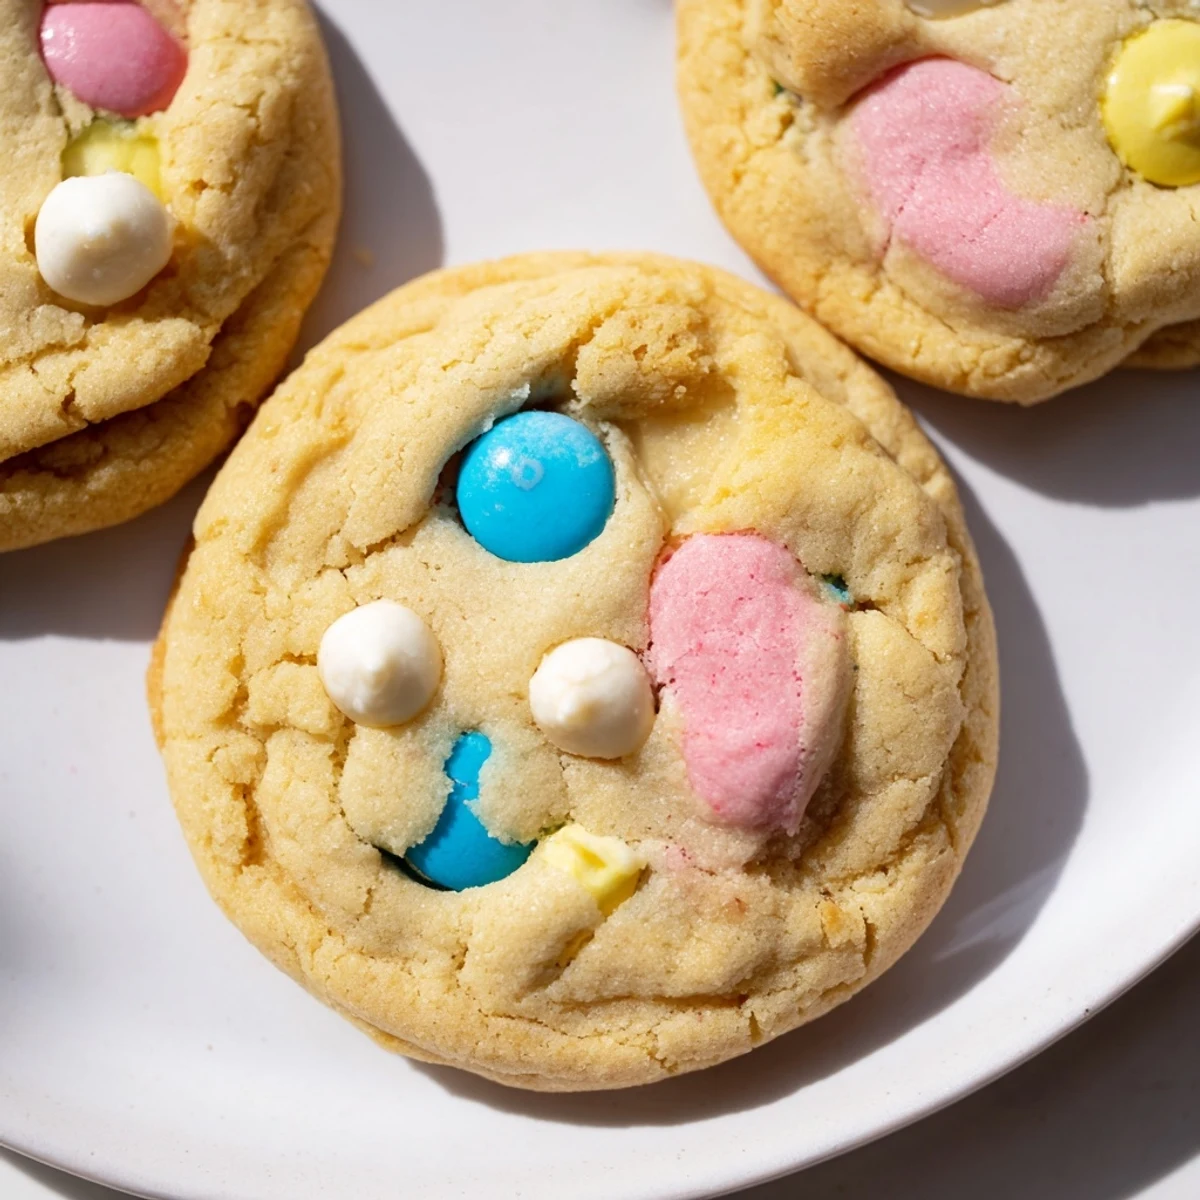
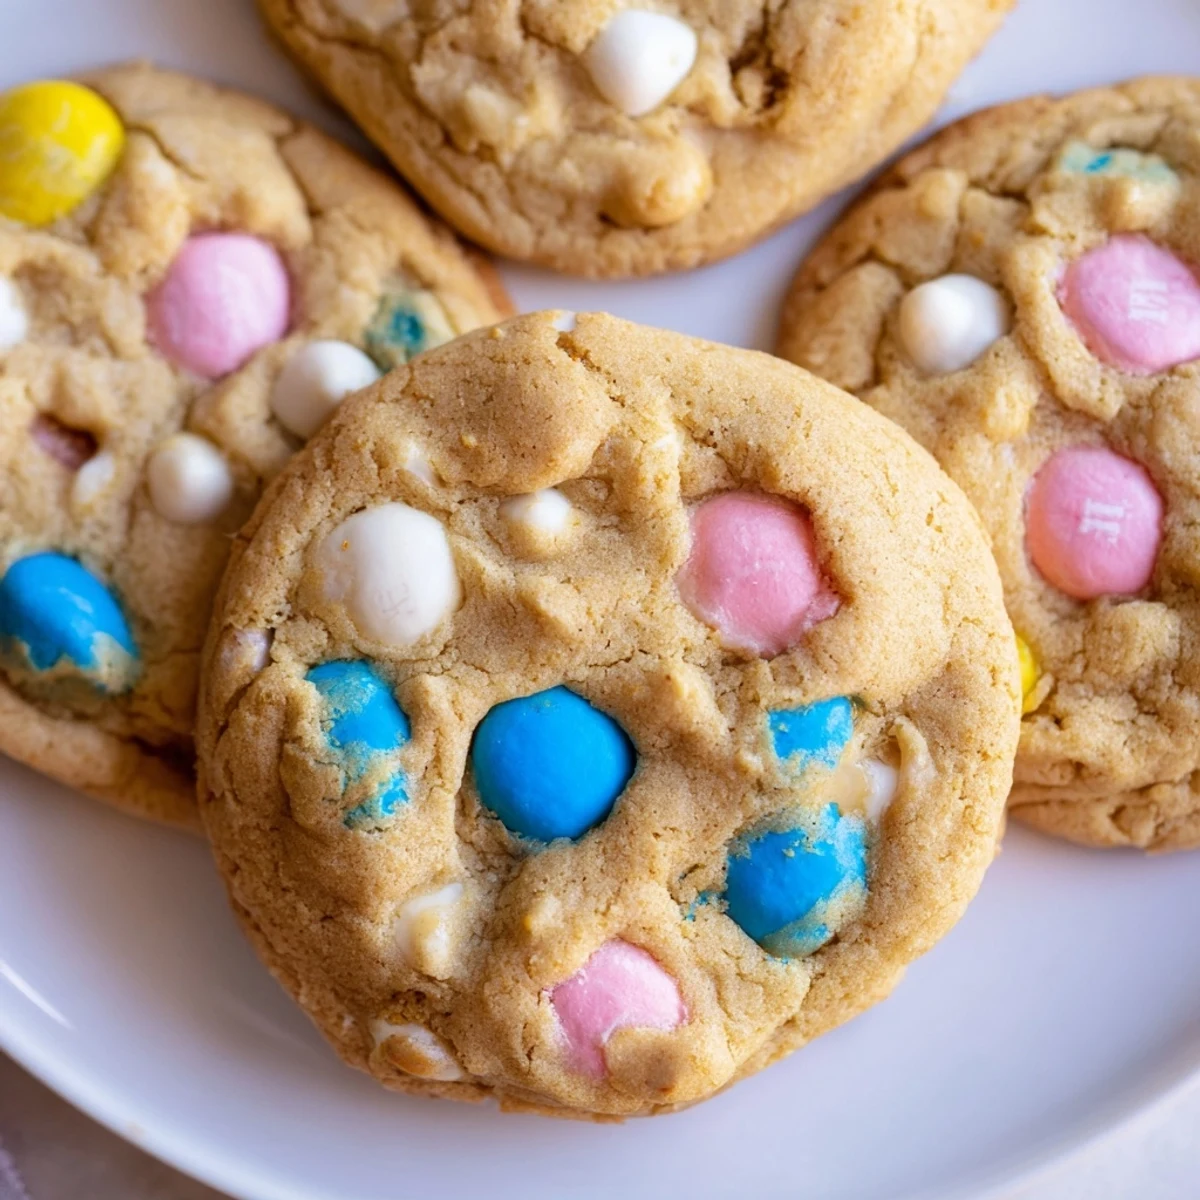
- 1 cup (180 g) chocolate M&M candies: Pastel Easter colors make these extra festive, but regular ones work perfectly fine
- 1/2 cup (90 g) white chocolate chips: These add creamy pockets that complement the candy shell crunch
- Extra M&M candies for topping: Press these gently into the dough before baking for that bakery look
- Bunny-shaped marshmallows or edible eyes: Totally optional but absolutely adorable if you're feeling crafty
Instructions
- Preheat and prepare your baking space:
- Preheat oven to 350°F (175°C) and line two baking sheets with parchment paper. This prep step saves so much stress later.
- Whisk the dry ingredients together:
- In a medium bowl, whisk flour, baking soda, and salt until evenly combined. Set this aside while you work on the wet ingredients.
- Cream the butter and sugars:
- In a large bowl, beat softened butter, brown sugar, and granulated sugar until light and fluffy, about 2 to 3 minutes. You'll notice the mixture turns pale and airy.
- Add eggs and vanilla:
- Beat in eggs one at a time, then mix in vanilla extract until everything is smooth and glossy.
- Combine everything:
- Gradually add the flour mixture to the wet ingredients, mixing on low speed until just combined. Don't overmix, a few streaks of flour are perfectly okay.
- Fold in the fun stuff:
- Gently fold in M&M candies and white chocolate chips by hand. The dough will be thick and speckled with colorful candy.
- Scoop and decorate:
- Using a medium cookie scoop, place dough balls 2 inches apart on prepared sheets. Top each with extra M&Ms and any bunny decorations you're using.
- Bake to perfection:
- Bake for 9 to 11 minutes until edges are set but centers look slightly underbaked. This is the secret to that soft, chewy texture.
- Cool completely:
- Let cookies rest on the baking sheet for 5 minutes, then transfer to a wire rack. They'll firm up beautifully as they cool.
 Save to Pinterest
 My sister called me the day after that neighborhood gathering, asking if I had any left hidden away. She said her kids kept talking about the bunny cookies at breakfast. Now it's become an annual tradition, and honestly, I think I look forward to our cookie decorating session more than the actual Easter dinner.
Making Them Your Own
One year I couldn't find pastel M&Ms so I used regular ones and added pastel sprinkles to the dough. The kids actually liked them better because of the extra sparkle. Don't be afraid to work with what you have.
The Storage Secret
I discovered these stay incredibly soft when stored in an airtight container with a slice of bread. The bread absorbs excess moisture and keeps the cookies perfectly chewy for up to five days. Not that they ever last that long in my house.
Getting Kids Involved
The decorating step is where little helpers really shine. Set up a station with extra M&Ms and let them create their own bunny faces. Some of the most memorable cookies are the ones with silly expressions or missing ears.
- Have wet wipes nearby for sticky fingers
- Let each child arrange their own unique topping pattern
- Take photos of their creations before they disappear
 Save to Pinterest
 There's something magical about baking with loved ones, creating sweet memories one colorful cookie at a time. Hope your kitchen fills with laughter and the smell of warm chocolate this Easter.
Recipe FAQs
- → What makes these cookies so soft and chewy?
-
The perfect softness comes from the precise ratio of brown sugar to butter, which creates moisture retention during baking. Removing cookies from the oven when centers appear slightly underbaked ensures they stay chewy rather than crisp. The 5-minute cooling period on the baking sheet allows the structure to set while maintaining that desirable soft texture.
- → Can I prepare the dough ahead of time?
-
Absolutely! The dough actually benefits from chilling for 30 minutes to 24 hours before baking. This rest period allows the flour to fully hydrate and the flavors to meld together. Chilled dough also holds its shape better during baking, resulting in thicker, more uniform cookies. Store dough balls in the refrigerator or freeze for longer storage.
- → What type of M&Ms work best for these?
-
Easter pastel-colored M&Ms create the most festive appearance, but any variety works wonderfully. Regular milk chocolate M&Ms provide classic flavor, while peanut or caramel-filled varieties add delightful surprise elements. For visual appeal, choose colors that complement your spring theme—pastels look particularly charming against the golden cookie base.
- → How should I store these to keep them fresh?
-
Keep cookies in an airtight container at room temperature for up to 5 days. Place a slice of white bread in the container to maintain softness—the cookies absorb moisture from the bread, staying perfectly chewy. For longer storage, freeze undecorated cookies in freezer bags for up to 3 months. Thaw at room temperature before serving.
- → Can I make these without the bunny decorations?
-
Certainly! The base cookies are delicious on their own, simply topped with extra M&M candies. The bunny decorations—marshmallows, edible eyes, or shaped toppings—are entirely optional enhancements. Even without the decorative elements, these colorful chocolate-studded cookies remain utterly charming and perfect for any spring celebration.
- → Why do the cookies need to cool on the baking sheet?
-
This 5-minute resting period is crucial for texture development. The cookies continue baking slightly from residual heat, allowing centers to set completely without becoming overdone. Removing them too soon causes crumbling, while moving them immediately to a rack can lead to spreading. Patience during this brief cooling ensures perfectly shaped, structurally sound cookies.
