 Save to Pinterest
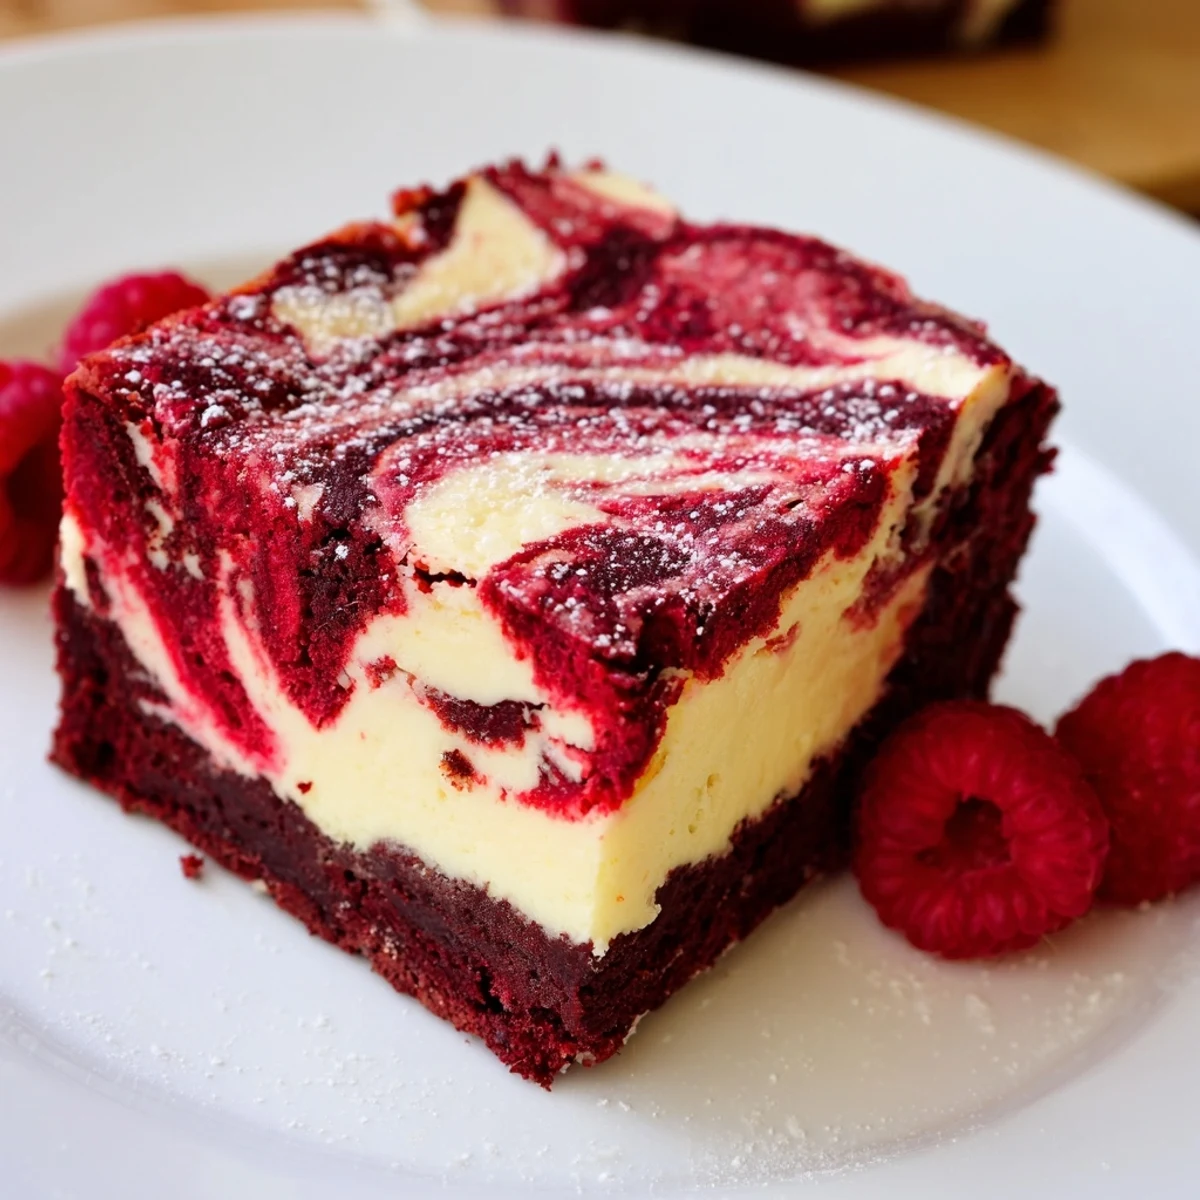
 Combine melted butter and sugar, then whisk in eggs, vanilla and red food coloring. Sift in flour, cocoa and salt and fold until just combined. Spread most batter into an 8-inch pan. Beat cream cheese with sugar, egg and vanilla and spread over the brownie base. Dollop reserved batter and swirl for a marbled top. Bake until center is mostly set, cool completely, then chill at least 1 hour before slicing into 16 squares. Serve chilled; garnish with berries or a dusting of powdered sugar.
I hadn’t planned on making red velvet brownies with cheesecake one rainy Tuesday, but the steady tap of rain and an impromptu craving for something velvety led me into the kitchen. The scent of melting butter mingled with cocoa as I assembled ingredients, and for a moment, the kitchen felt like a small world of its own. Red velvet may be dramatic in color, but paired with a plush cheesecake layer, it’s truly a showstopper even when made just for yourself. Sometimes, dessert becomes an event all on its own, even when you’re still in your slippers.
I once brought a batch of these brownies to a friend’s potluck, a little nervous because my swirl had gone slightly awry. To my surprise, the jagged marbling earned more compliments than any perfectly dainty finish I’d tried before. There’s something so inviting about a dessert where each piece is a bit unique, a sweet little story baked in.
Ingredients
- Unsalted butter (115 g): Melting the butter fully gives these brownies their signature dense chew—don’t rush this step or skimp on the chill time.
- Granulated sugar (200 g + 65 g): You’ll use sugar in both layers, so measure out ahead—it helps get those creamy, glossy tops on the brownies.
- Large eggs (2 + 1): Letting the eggs come to room temperature makes mixing smooth and helps prevent lumps in the cheesecake layer.
- Vanilla extract (2 tsp + 1 tsp): I find real vanilla transforms the flavor: if you can, use pure extract instead of artificial for more depth.
- Red food coloring (1 tbsp): A vivid red is the goal—gel gives a more intense color, but liquid works as well; adjust if you desire a deeper hue.
- All-purpose flour (95 g): Sift this to avoid any clumps; it ensures even texture within the rich brownie base.
- Unsweetened cocoa powder (15 g): Even a small amount makes a difference; opt for a good, dark cocoa for the best flavor.
- Salt (1/4 tsp): Just a pinch lifts all the other flavors.
- Cream cheese (225 g): Softened at room temperature, it whips smoothly without pesky lumps—patience pays off here.
Instructions
- Set Up Your Baking Pan:
- Line your square pan with parchment so the edges overhang—it’s my secret for perfect, easy lifting later on.
- Mix the Brownie Batter:
- Whisk melted butter and sugar until glossy, then beat in eggs, vanilla, and that generous swirl of red food coloring for a deeply colored base.
- Combine Dry Ingredients:
- Sift in flour, cocoa, and salt; gently fold with a spatula, feeling the batter thicken beneath your hand—stop as soon as it’s just blended.
- Base Layer and Reserve:
- Spread 3/4 of the lush red velvet batter in the prepared pan, setting the remainder aside for swirling later; it’s stubbornly thick, so use gentle swipes to get even coverage.
- Prepare Cheesecake Layer:
- With a mixer or sturdy whisk, beat softened cream cheese and sugar until lavishly smooth, then add egg and vanilla—keep mixing until there’s no grit left.
- Assemble and Swirl:
- Gently pour creamy cheesecake over the brownie, leveling softly with a spatula; dot the top with reserved red velvet and use a skewer to marble with patient, slow swirls for a dramatic finish.
- Bake to Perfection:
- Into the oven they go; at around 35 minutes, the kitchen should start to fill with warm, sweet chocolate notes—check with a toothpick for just a few moist crumbs.
- Cool and Chill:
- Let the pan cool completely, then transfer to the fridge for at least an hour before slicing—waiting is tough, but so worth it.
 Save to Pinterest
 I’ll never forget the silence that fell around the table as everyone took their first bite—sometimes the best conversations start with a forkful of something truly special. That day, a pan full of these crimson-swirled brownies felt like a gift meant to be shared, laughter and stories baked right in.
Making Marbled Swirls Less Intimidating
When I first tried swirling the red velvet and cheesecake layers, I worried about getting it right—but I learned that imperfections are part of the appeal. A slender skewer or even a butter knife does the trick, and swirling too much can actually blur the lovely contrast. If in doubt, three gentle passes from corner to corner create pretty, unique marbling. The pan always comes out looking like you made edible art.
Serving Suggestions You’ll Crave
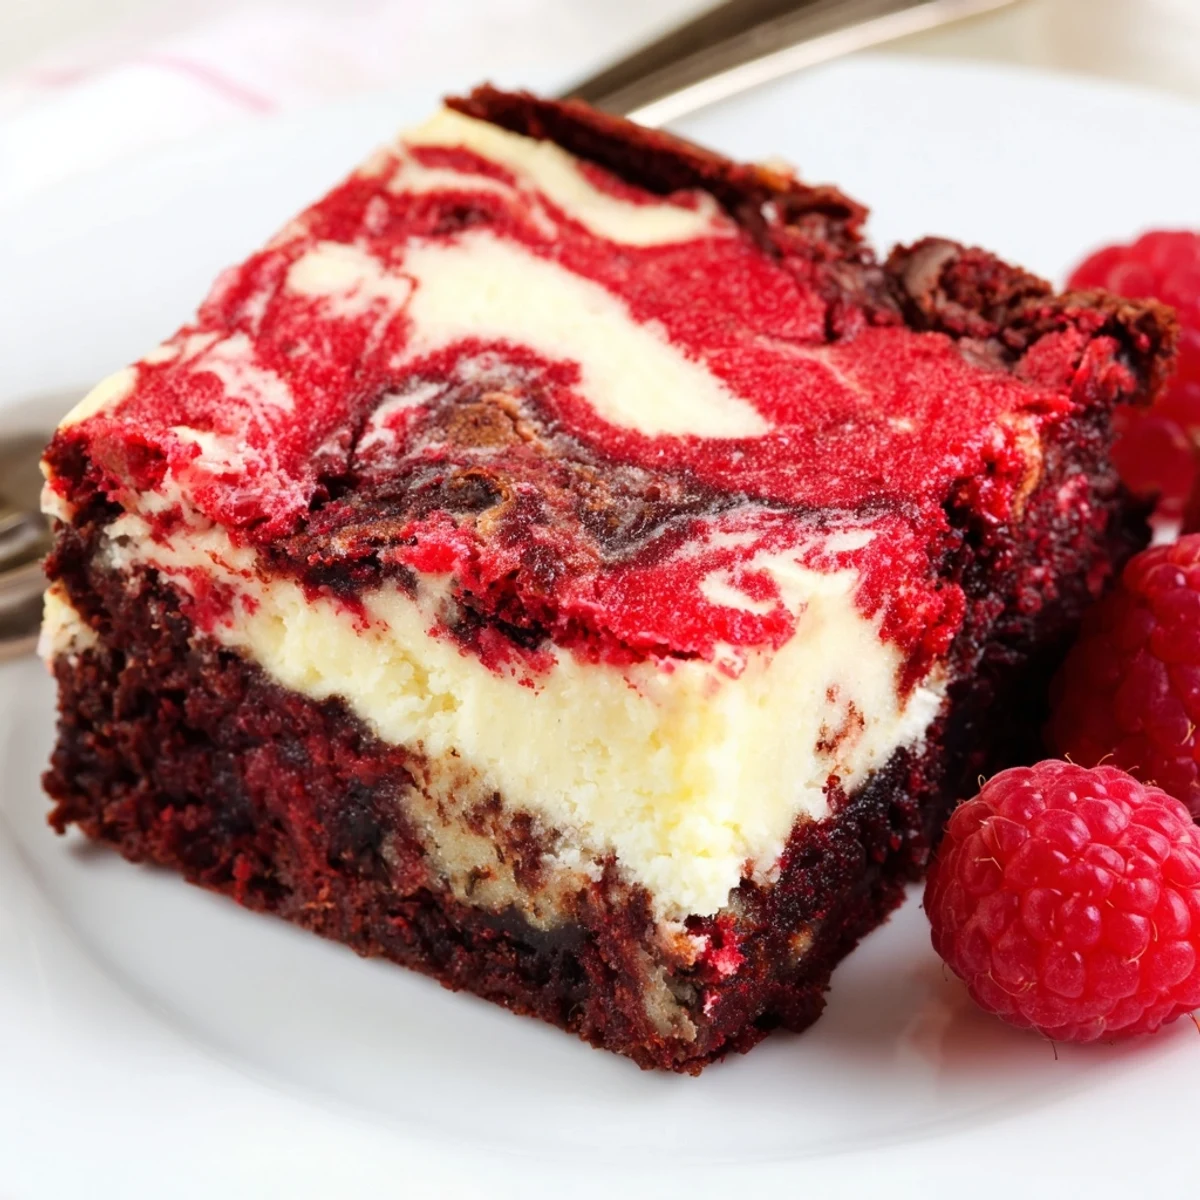
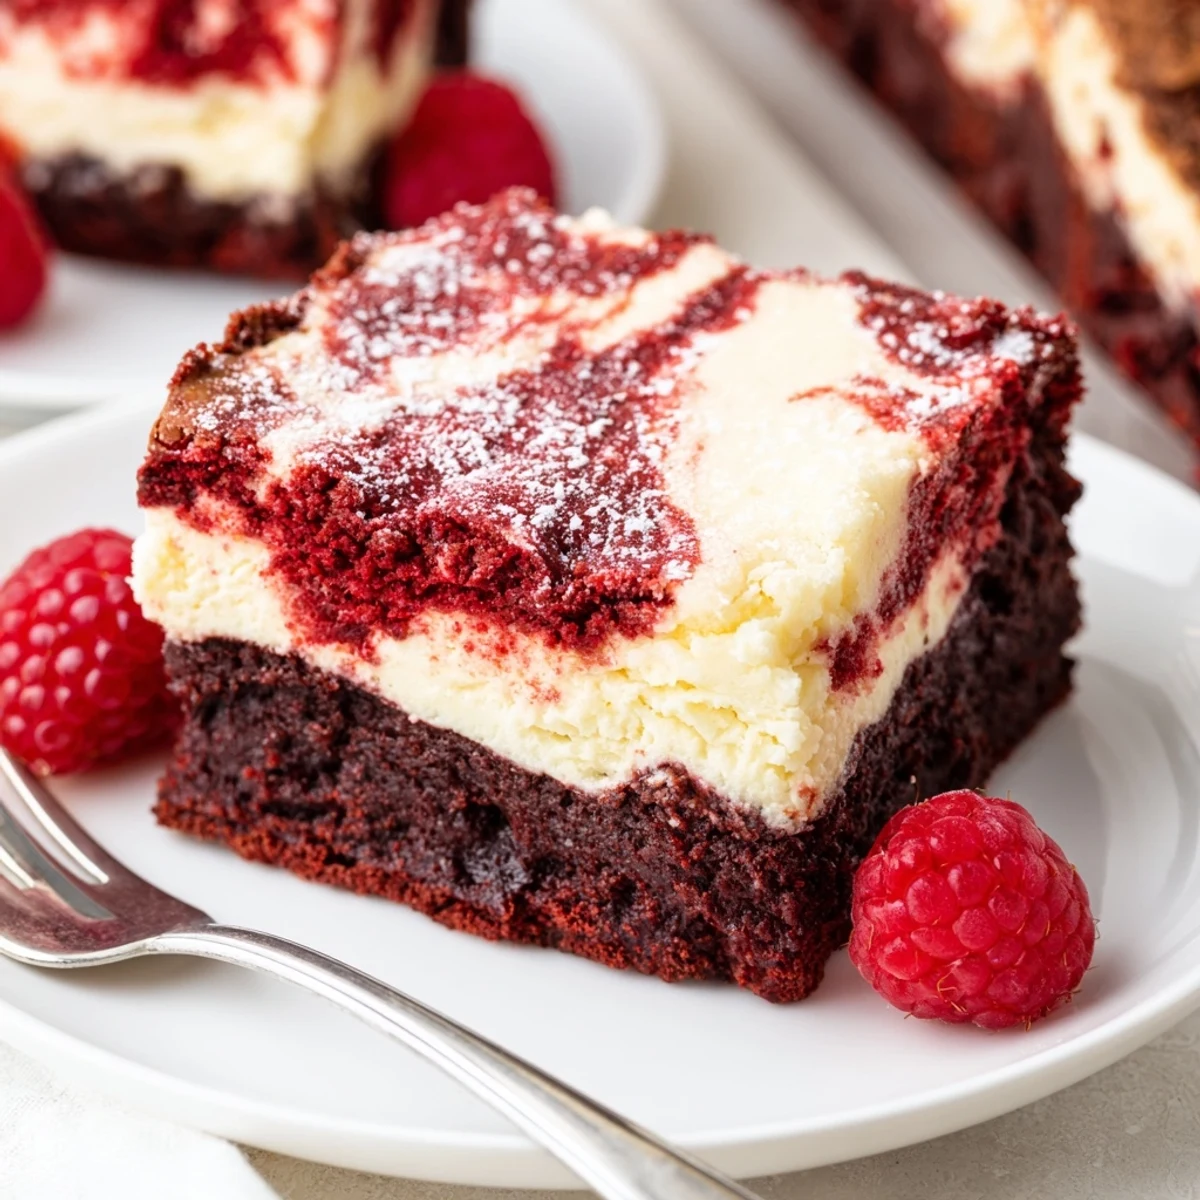
These brownies are especially wonderful when served chilled, straight from the fridge. I like to pile a few on a pretty plate, dusted with powdered sugar or scattered with tart raspberries for a pop of color. On very special occasions, a scoop of vanilla ice cream alongside is dangerously good. The marriage of creamy and fudgy gets even better with a little contrast on the plate.
Troubleshooting: Lessons Learned in Real Time
Not every pan has turned out perfectly in my hands. There were sunken centers once when I overmixed, and cracks when I overbaked thinking more was better. What matters is learning as you go and knowing dessert doesn’t have to be flawless to be delicious.
- If your cheesecake layer cracks, chill thoroughly before cutting—it helps hide and heal the surface.
- If brownies are overly gooey, check oven temperature accuracy or let them finish setting in the fridge.
- Don’t skip the parchment overhang: it’ll save you when it’s time to get pristine squares out of the pan.
 Save to Pinterest
 May every batch remind you that bold colors and creamy layers are best enjoyed with a little curiosity and lots of good company. Let the swirls surprise you and enjoy every sweet, messy bite!
Recipe FAQs
- → How do I get a deep red color without altering texture?
-
Use concentrated gel food coloring for vivid color with less liquid. Add gradually and mix until evenly distributed to avoid thinning the batter.
- → Why is chilling recommended before slicing?
-
Chilling firms the cheesecake layer and helps cleanly set the fudgy brownie beneath, preventing crumbling and yielding neat squares.
- → How can I prevent the cheesecake from cracking?
-
Avoid overmixing the cheesecake batter and bake until the center is mostly set but still slightly jiggly; cooling slowly reduces sudden temperature shifts that cause cracks.
- → Can I add chocolate chips or other mix-ins?
-
Yes—sprinkle chocolate chips over the brownie layer before adding the cheesecake for pockets of melted chocolate. Fold-ins should be moderate to preserve texture.
- → What signs indicate the bars are done baking?
-
The edges will be set and a toothpick inserted in the center should come out mostly clean with a few moist crumbs; the cheesecake should no longer be liquid.
- → How should I store leftovers?
-
Cover and refrigerate for up to 4–5 days to maintain the cheesecake texture. Bring to room temperature briefly before serving for softer bite if desired.
