 Save to Pinterest
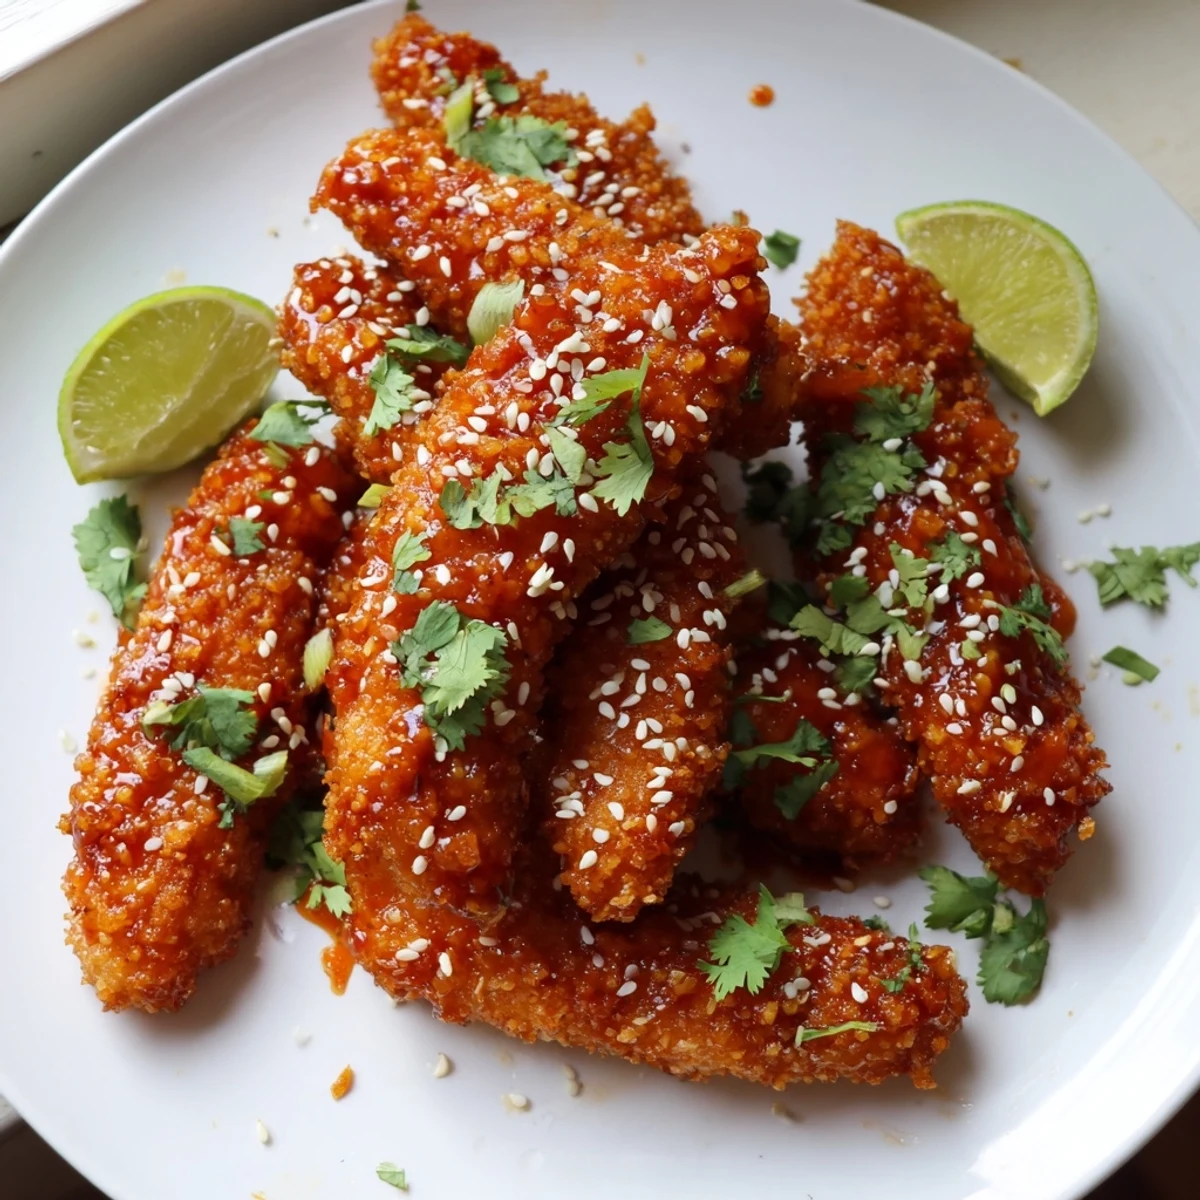
 These Thai sticky chicken fingers feature crispy panko-coated chicken tenders tossed in a vibrant glaze made from sweet chili sauce, honey, soy sauce, and a hint of sriracha. The chicken is marinated in a bold mix of fish sauce, lime, garlic, and ginger before being baked or fried to golden perfection.
Ready in just 45 minutes with minimal prep, they work beautifully as a main dish alongside jasmine rice or as a crowd-pleasing appetizer for gatherings. A garnish of sesame seeds and fresh cilantro adds the perfect finishing touch.
The sizzle of chicken hitting a hot pan on a rainy Tuesday evening is what kicked off my obsession with these Thai sticky fingers. I had leftover sweet chili sauce in the fridge and a pound of chicken tenders that needed purpose. Twenty minutes later, my kitchen smelled like a Bangkok street stall and I was licking sauce off my fingers standing over the stove.
I brought a platter of these to a friends potluck last summer and watched three people ignore the fancy charcuterie board to hover near the chicken. One friend actually hid two extras behind the dip bowl so nobody else would grab them.
Ingredients
- Chicken tenders or breast strips (600 g): Tenders save you knife work, but breast cut into even strips works just as well and tends to be cheaper.
- Soy sauce (2 tbsp for marinade plus 2 tbsp for sauce): This pulls double duty, seasoning the meat and building depth in the glaze.
- Lime juice (1 tbsp): Fresh is nonnegotiable here, the bottled stuff tastes flat against the fish sauce.
- Fish sauce (1 tbsp): It smells pungent raw but mellows into something magical when it cooks with the other marinade ingredients.
- Garlic, minced (1 clove): One clove is enough for the marinade because the sauce brings its own savory backbone.
- Fresh ginger, grated (1 tsp): Rub it on a microplane and add it right before the chicken so the brightness does not fade.
- All purpose flour (100 g): The first coat seals in moisture and gives the egg something to cling to.
- Eggs (2 large): Beat them well with a fork, any streaks of white will cause patchy breading.
- Panko breadcrumbs (120 g): Panko is the secret to that shatteringly crisp exterior that regular breadcrumbs cannot match.
- Salt and pepper (1/2 tsp each): Mixed into the panko so every inch of crust is seasoned, not just the surface.
- Sweet chili sauce (60 ml): This is the backbone of the sticky glaze and you can find it in any grocery store Asian aisle now.
- Honey (2 tbsp): It thickens the sauce as it simmers and rounds out the chili heat.
- Rice vinegar (1 tbsp): A small pour cuts the sweetness and keeps the glaze balanced.
- Sriracha (1 tbsp, optional): Add it if you want a real kick, skip it for a kid friendly version.
- Sesame oil (1/2 tsp): Just a drizzle at the end adds that toasty, nutty aroma that makes everything taste more Thai.
- Garnishes (sesame seeds, cilantro, lime wedges): Totally optional but they make the platter look like it came from a restaurant.
Instructions
- Marinate the chicken:
- Whisk the soy sauce, lime juice, fish sauce, minced garlic, and grated ginger in a bowl until combined. Toss the chicken strips in, cover with wrap, and let them soak up all that flavor for at least 15 minutes while you set up everything else.
- Set up the breading station:
- Line up three shallow dishes: flour in the first, beaten eggs in the second, and panko mixed with salt and pepper in the third. This assembly line keeps your hands cleaner and your coating even.
- Preheat your oven or pan:
- Crank the oven to 200 degrees Celsius (400 Fahrenheit) and line a baking sheet with parchment paper. If you prefer frying, heat about a quarter inch of oil in a wide pan over medium high until it shimmers.
- Bread each piece:
- Shake off excess marinade, then drag each strip through flour, dunk it in egg, and press it firmly into the panko until every side is coated. Really press the crumbs on with your palms for maximum crunch.
- Cook until golden:
- Arrange the strips on your baking sheet and bake 18 to 22 minutes, flipping once halfway through. If frying, give them about 3 to 4 minutes per side until deeply golden and cooked through.
- Make the sticky sauce:
- While the chicken cooks, combine sweet chili sauce, honey, soy sauce, rice vinegar, sriracha if using, and sesame oil in a small saucepan over medium heat. Stir constantly for 3 to 5 minutes until it bubbles and thickens enough to coat the back of a spoon.
- Toss and glaze:
- Transfer the hot chicken fingers into a large bowl, pour the warm sauce over them, and toss gently with tongs until every piece is lacquered and glistening. Work quickly so the coating stays crisp underneath.
- Serve with flair:
- Pile the saucy fingers onto a platter, scatter sesame seeds and torn cilantro over the top, and nestle lime wedges around the edges. Serve immediately because the crunch factor drops the longer they sit.
 Save to Pinterest
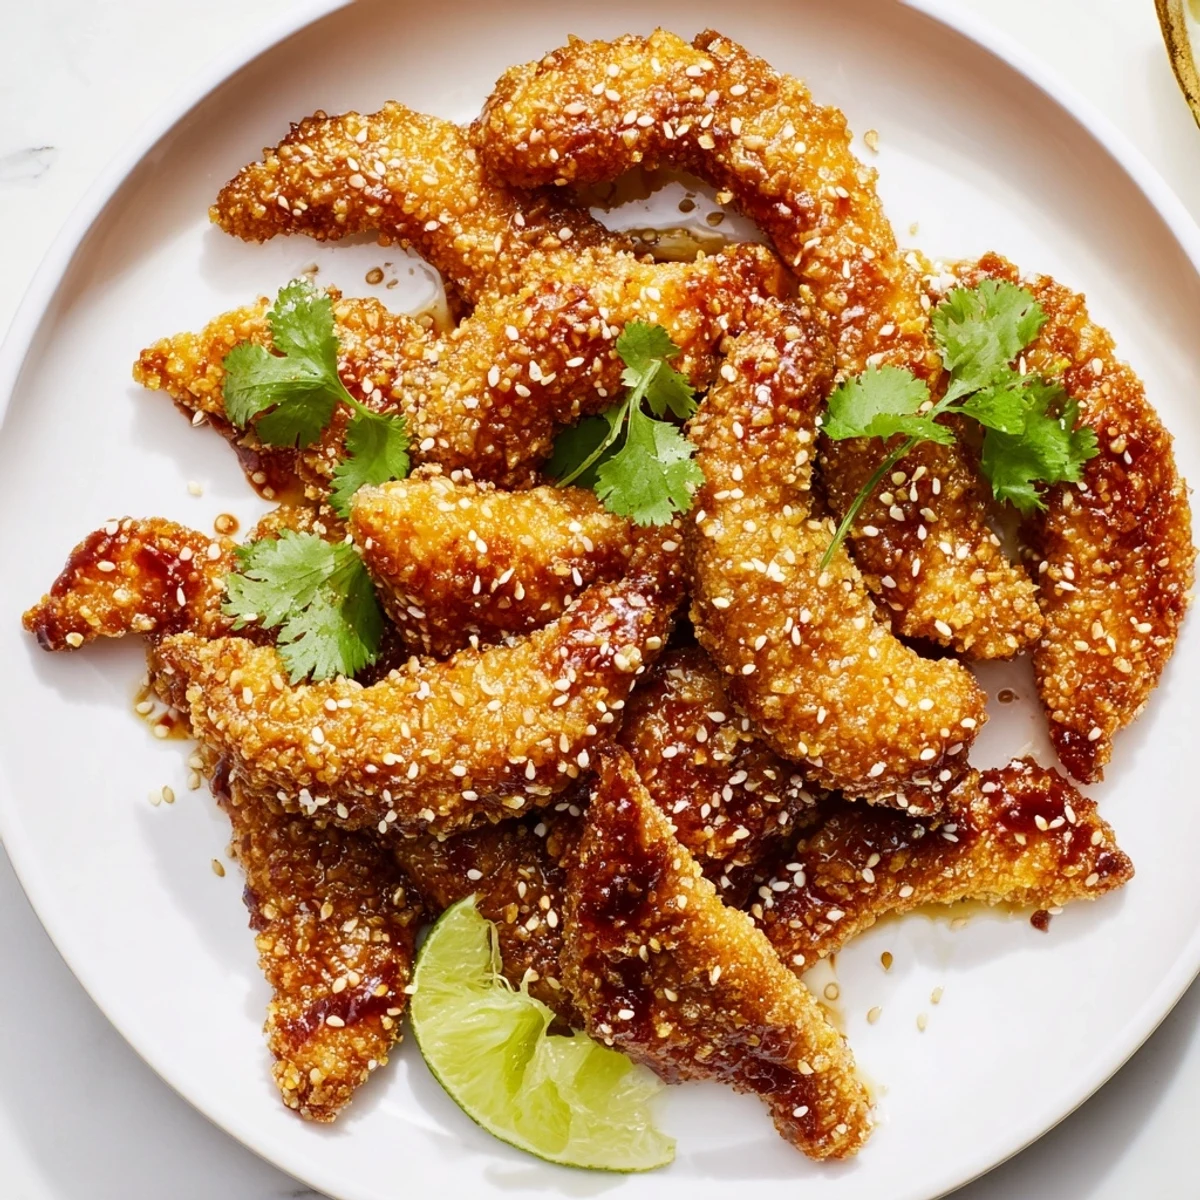
 The night my partner called these better than any takeout we have ever had, I knew this recipe had earned a permanent spot in our weeknight rotation.
Getting That Extra Crunch
For a crust that holds up longer under the sauce, try a double coat by dipping the breaded strips back into the egg and panko one more time. It sounds fussy but the payoff is a seriously thick, crackly shell that stays crispy even after tossing in the glaze.
Serving Suggestions That Work
These fingers are substantial enough to anchor a full meal alongside jasmine rice and a quick cucumber salad dressed with rice vinegar and sugar. For parties, skip the sides entirely and just double the sauce for extra dipping, they disappear faster than anything else on the table.
Storing and Reheating Leftovers
If you somehow end up with leftovers, the chicken keeps well in the fridge for up to three days and reheats in a hot oven or air fryer in about five minutes. The glaze will have soaked in overnight, which actually makes them delicious in a different, more saucy way.
- Always reheat uncovered so the panko has a chance to crisp back up.
- Store the sauce separately if you plan ahead, then toss fresh when ready to eat.
- Never microwave them if you care about the crust at all.
 Save to Pinterest
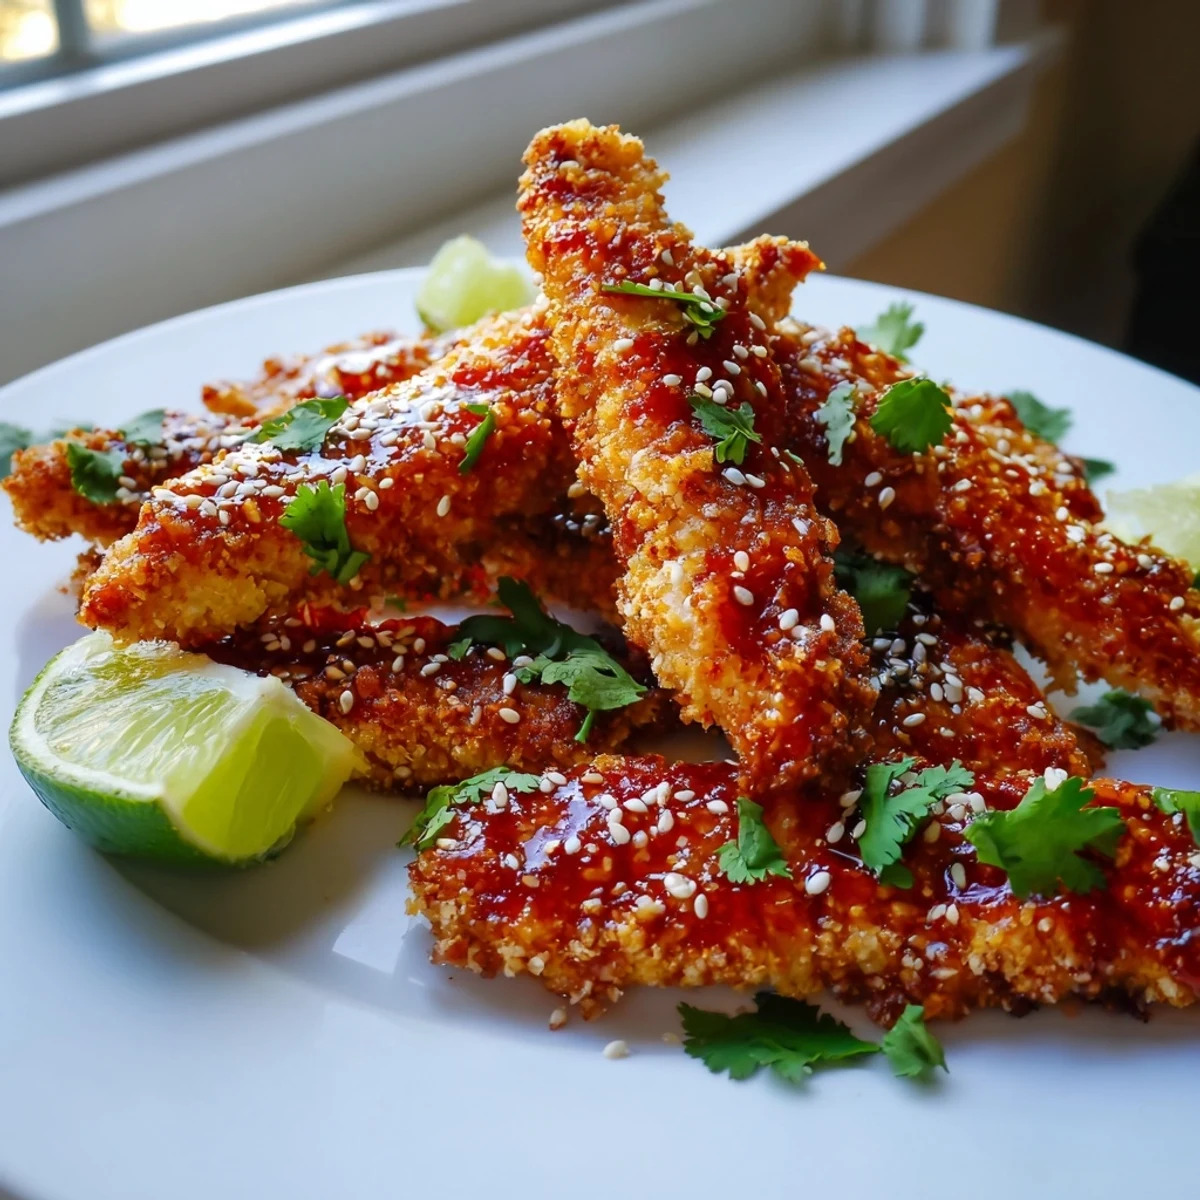
 Once you make these once, you will start keeping sweet chili sauce stocked at all times just in case the craving hits. They are that kind of recipe, easy, loud, and impossible to stop eating.
Recipe FAQs
- → Can I bake these chicken fingers instead of frying?
-
Yes, you can bake them at 200°C (400°F) for 18-22 minutes, flipping halfway through. They will still develop a crispy panko crust, especially if you give them a light spray of oil before baking.
- → How do I get the chicken extra crispy?
-
For maximum crunch, try a double-coating method by dipping the chicken in egg and panko a second time. Also, ensure your oven or oil is fully preheated before cooking, and avoid overcrowding the pan.
- → Is the sriracha in the sticky sauce mandatory?
-
No, sriracha is optional and added purely for heat. If you prefer a milder, sweeter glaze, simply leave it out. The sweet chili sauce already provides a gentle warmth on its own.
- → Can I make this gluten-free?
-
You can substitute the all-purpose flour and panko with gluten-free alternatives, and replace soy sauce with tamari. Just be sure to check all sauce labels, especially the fish sauce, for hidden gluten.
- → What should I serve with Thai sticky chicken fingers?
-
They pair well with steamed jasmine rice, a refreshing cucumber salad, or stir-fried vegetables. For a party setting, serve them on a platter with extra dipping sauce and lime wedges on the side.
- → How long should I marinate the chicken?
-
A minimum of 15 minutes is fine, but for deeper flavor, you can marinate the chicken for up to 2 hours in the refrigerator. Avoid marinating overnight, as the lime juice can start to break down the texture.
