 Save to Pinterest
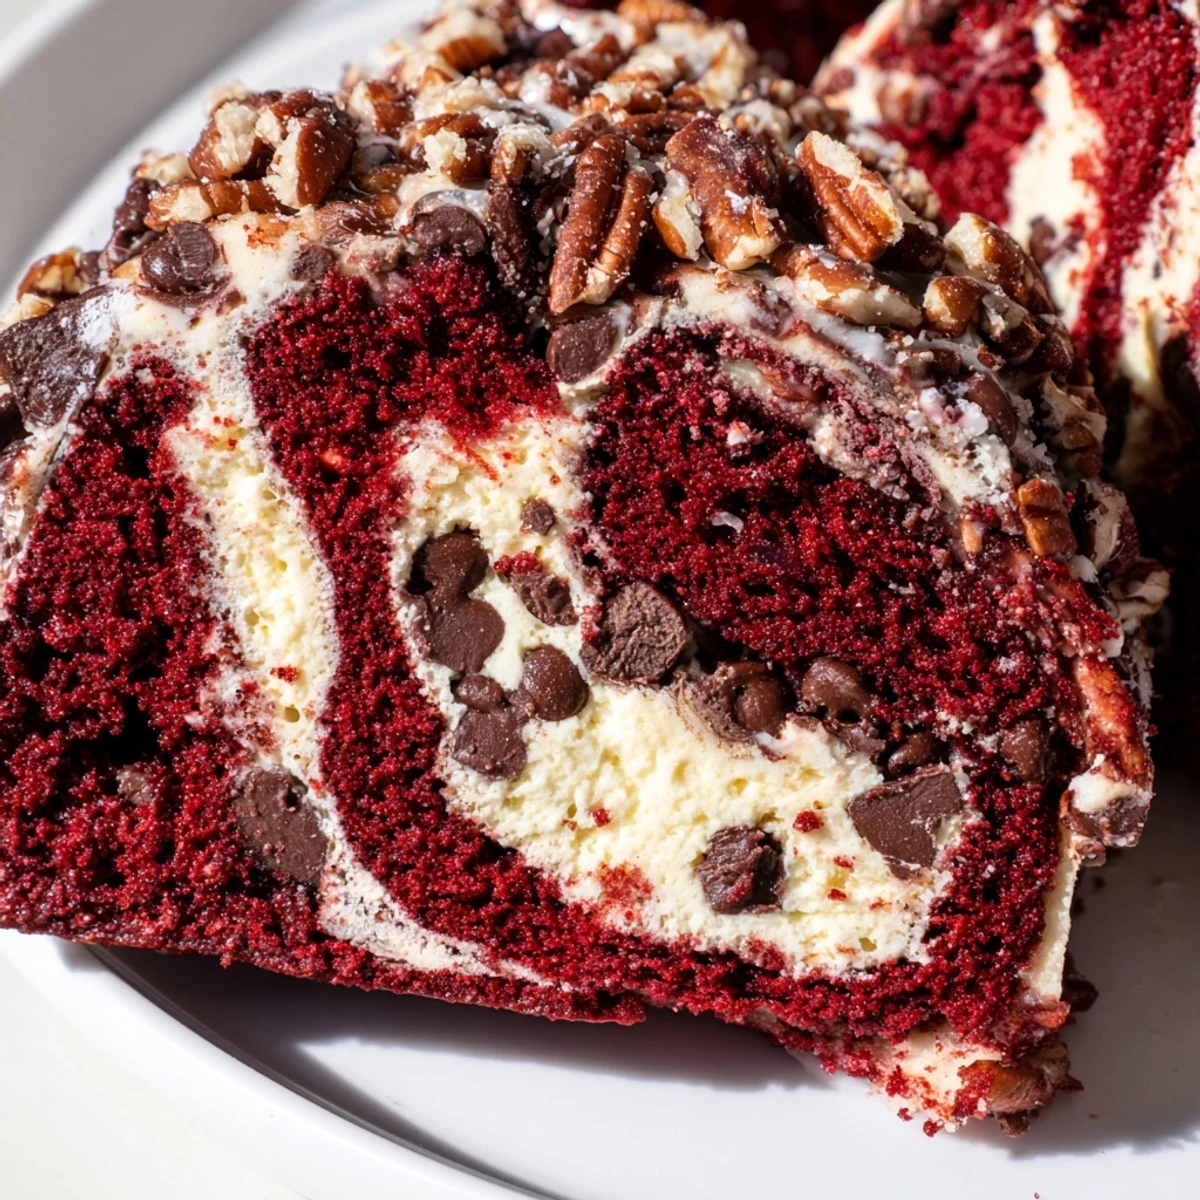
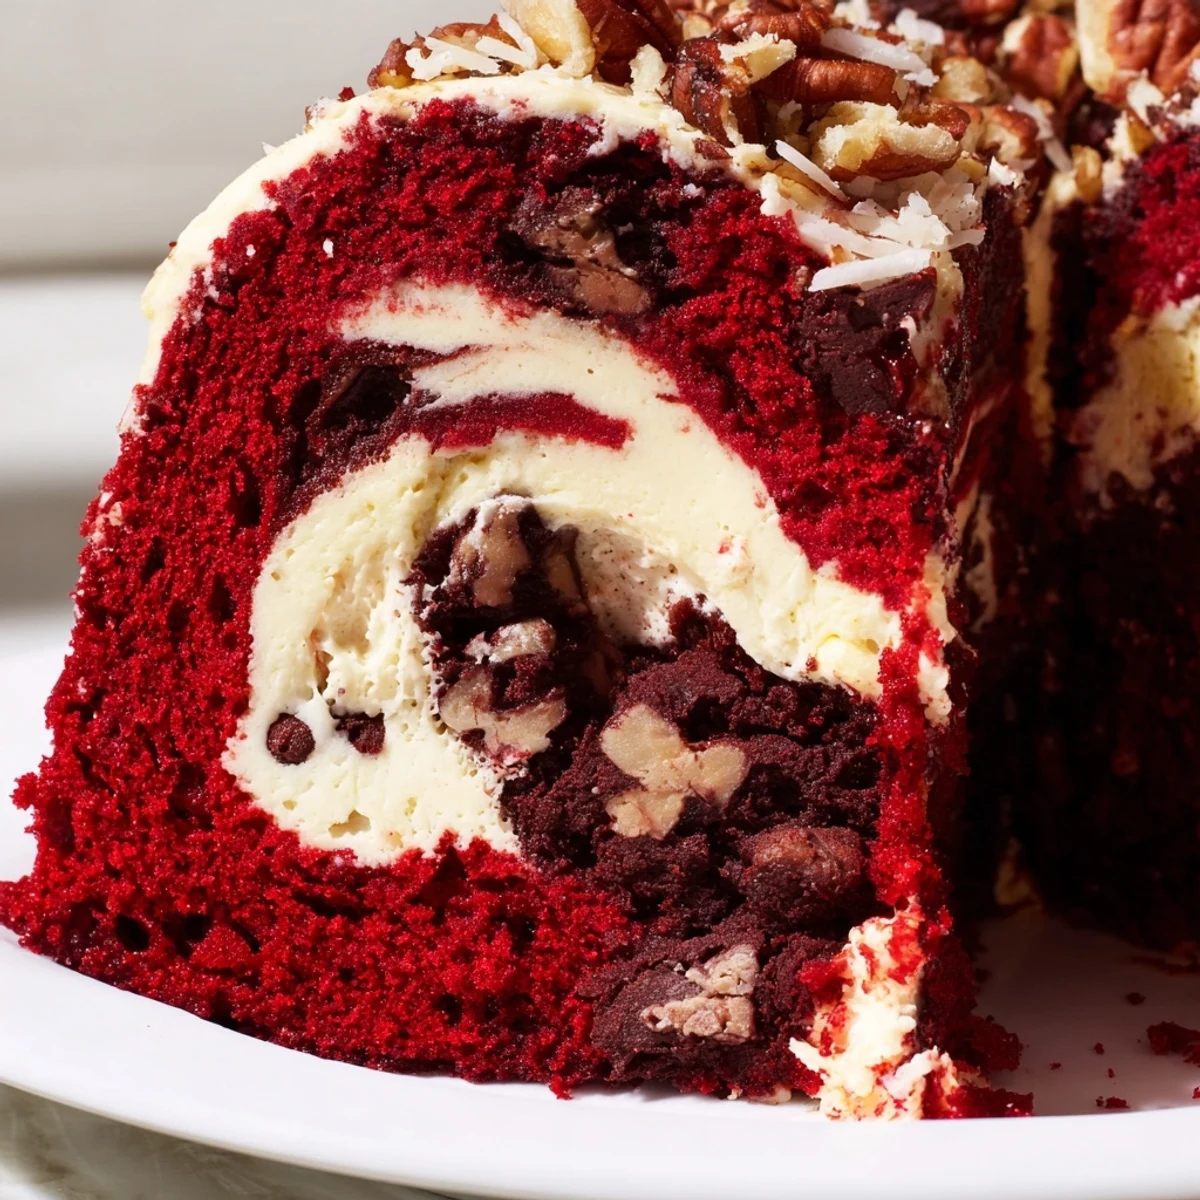
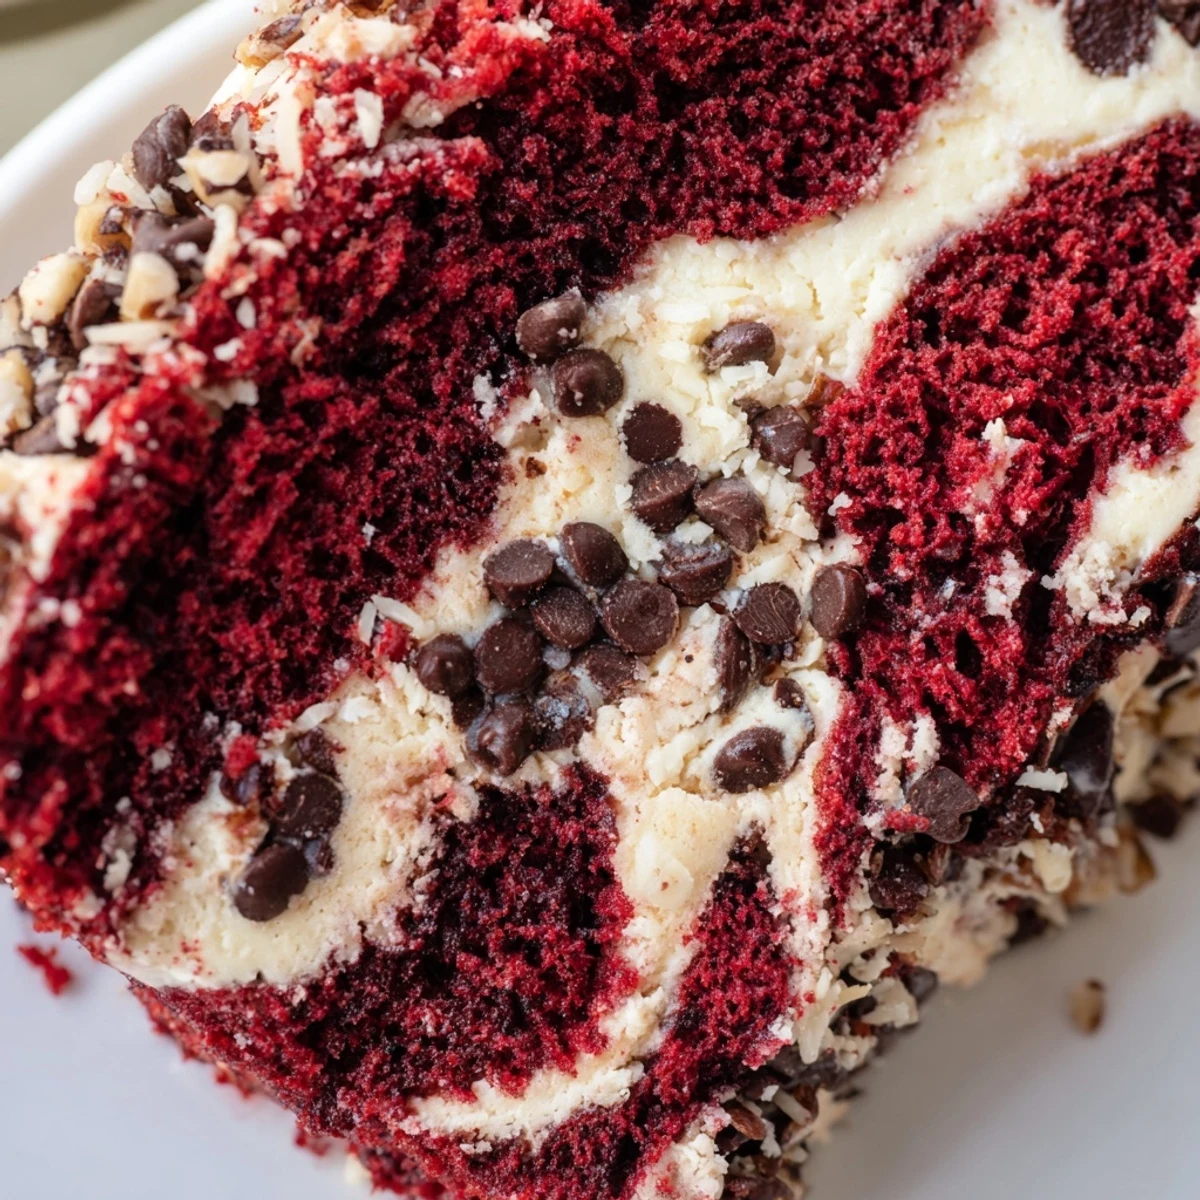
 This stunning red velvet creation features a moist cake base swirled with rich cream cheese mixture that creates dramatic cracked appearance while baking. The addition of semi-sweet chocolate chips and optional pecans adds delightful texture and depth. Perfect for gatherings, this dessert balances classic red velvet flavors with creamy, gooey elements that make every bite memorable.
The batter comes together quickly using a boxed mix shortcut, while the homemade cream cheese swirl elevates it to something special. During baking, the cream cheese layer sinks and creates beautiful marbled patterns throughout the vibrant red cake.
My sister texted me at 11pm one night demanding I come over immediately because she'd made the most chaotic cake she'd ever seen. When I walked into her kitchen, there was this crimson marbled mess in a 9x13 pan, but one taste of that warm, gooey center and I forgot everything I knew about baking being precise. She called it earthquake cake because it cracked and swirled all over itself, creating these incredible little pockets of cream cheese fudge throughout the red velvet.
Last Christmas, I brought this to my office potluck and watched it disappear in under seven minutes flat. Three different coworkers asked for the recipe, and when I explained it was basically just red velvet mix with cream cheese dolloped on top, they looked at me like I'd revealed a magic trick. Now it's the only dessert my coworkers actually request by name.
Ingredients
- Red velvet cake mix: Using a high-quality mix gives you that perfect tender crumb without all the measuring—look for one that already contains cocoa powder for deeper flavor.
- Buttermilk: This is what keeps red velvet moist and gives it that signature tang, and I've learned the hard way that regular milk just doesn't give you the same tender texture.
- Cream cheese: Make sure it's completely softened to room temperature so your swirl mixture blends into silky clouds instead of lumpy bits.
- Butter: Unsalted lets you control the salt level, and softened butter incorporates much faster than cold—no one wants grainy cream cheese swirls.
- Powdered sugar: Sift it if it's clumpy, because nothing ruins a beautiful swirl like discovering tiny sugar lumps in your cream cheese layer.
- Chocolate chips: Semi-sweet balances all that sugar, but milk chocolate makes it extra indulgent if you've got a serious sweet tooth.
- Pecans: Toast them in a dry skillet for three minutes before sprinkling, and the nutty flavor becomes so much more pronounced.
- Sweetened coconut: Even coconut haters sometimes don't mind it here since it gets toasty and crisp on top, adding this incredible chewy-crunchy texture.
Instructions
- Get your oven ready:
- Preheat to 350°F and generously grease a 9x13 pan with butter or cooking spray, really getting into the corners.
- Make the red velvet base:
- Beat the cake mix, eggs, oil, buttermilk, and vanilla for two full minutes until completely smooth, scraping down the bowl halfway through.
- Spread the batter:
- Pour it evenly into your prepared pan, using an offset spatula to level the surface.
- Whip up the swirl:
- Beat the softened cream cheese and butter until creamy, then gradually add powdered sugar and vanilla, mixing until fluffy and completely smooth.
- Create the earthquake effect:
- Drop dollops of cream cheese mixture all over the batter, then run a knife through in swirling motions—not too much or you'll lose the distinct marble pattern.
- Add the toppings:
- Sprinkle chocolate chips, pecans, and coconut evenly across the surface, gently pressing them in so they don't roll off.
- Bake until mostly set:
- Bake for 38 to 42 minutes—the center should still jiggle slightly when you move the pan because it keeps cooking as it cools.
- Let it rest:
- Cool for at least 30 minutes before slicing, which feels impossible but gives the cream cheese layer time to set up properly.
 Save to Pinterest
 The moment I cut into that first pan at my sister's apartment, steam rising from those chocolate-streaked fissures, I understood why she'd been texting me in all caps. Something about the contrast between that velvety red cake and the tangy cream cheese rivers running through it makes this absolutely impossible to stop eating.
Serving Temperature Matters
I've served this at room temperature, slightly warmed, and straight from the fridge, and each creates a completely different experience. Warm emphasizes that molten cream cheese quality, while chilled lets the flavors meld overnight into something even more intense.
Make It Ahead
This cake actually tastes better the next day once the flavors have had time to mingle in the refrigerator. Wrap it tightly and it'll stay fresh for four days, though I've never personally kept it around past day two.
Customize Your Swirl
The beauty of this recipe is how easily it adapts to whatever you're craving. I've swapped in different mix-ins depending on who I'm serving, and it turns out beautifully every single time.
- White chocolate chips make it feel more elegant and slightly less intense.
- Chopped walnuts or almonds give it a different nutty profile if pecans aren't your thing.
- A pinch of cinnamon in the cream cheese mixture adds this warmth that pairs unexpectedly well with red velvet.
 Save to Pinterest
 There's something wonderfully forgiving about a dessert that's supposed to look messy and taste incredible. This cake has saved me more last-minute dessert emergencies than I care to admit.
Recipe FAQs
- → Why is it called earthquake cake?
-
The name comes from the dramatic cracked and swirled appearance that develops during baking. As the cream cheese mixture sinks into the batter, it creates fault lines and uneven surfaces resembling earthquake activity.
- → Can I make this from scratch instead of using a mix?
-
Absolutely. Substitute the box mix with your favorite homemade red velvet cake recipe. Keep the same proportions for wet ingredients to maintain proper consistency.
- → Should this cake be served warm or chilled?
-
Both ways work beautifully. Warm serving emphasizes the gooey, molten texture of the cream cheese areas. Chilling for a few hours firms everything up for cleaner slices and more structured presentation.
- → How long does this keep?
-
Store covered at room temperature for up to 3 days, or refrigerate for up to a week. The flavors actually develop and intensify after a day. Bring chilled slices to room temperature before serving for best texture.
- → Can I freeze this dessert?
-
Yes, freeze individual slices wrapped tightly in plastic wrap and foil for up to 3 months. Thaw overnight in the refrigerator. The texture may be slightly denser after freezing but remains delicious.
- → What variations can I try?
-
Swap pecans for walnuts, use white chocolate chips instead of semi-sweet, or omit coconut if preferred. For extra richness, drizzle with warmed cream cheese frosting or chocolate ganache before serving.
