 Save to Pinterest
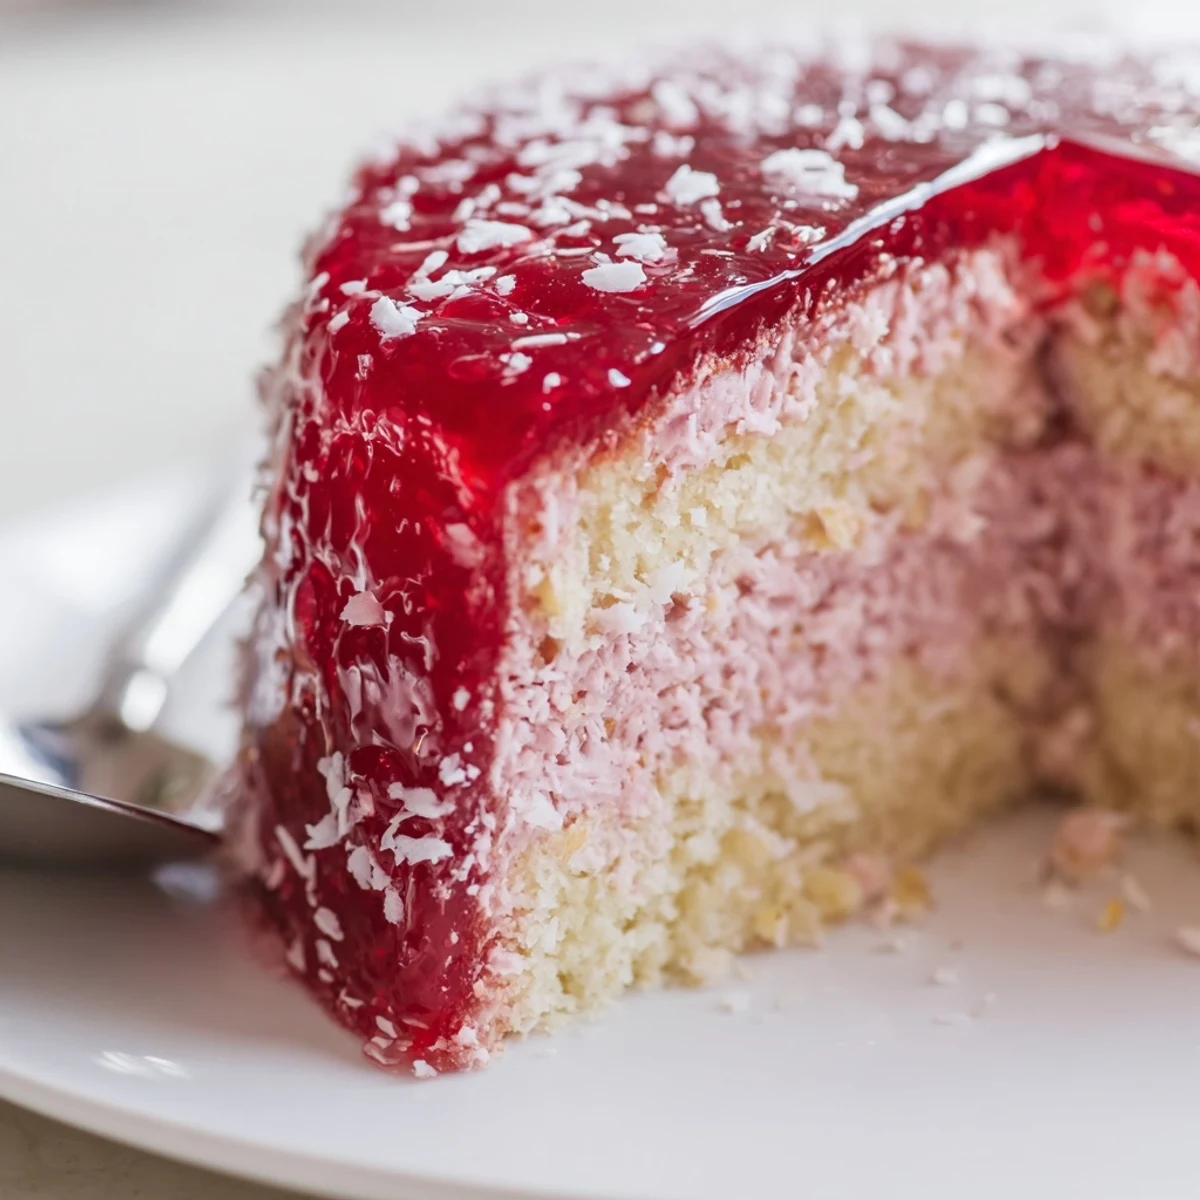
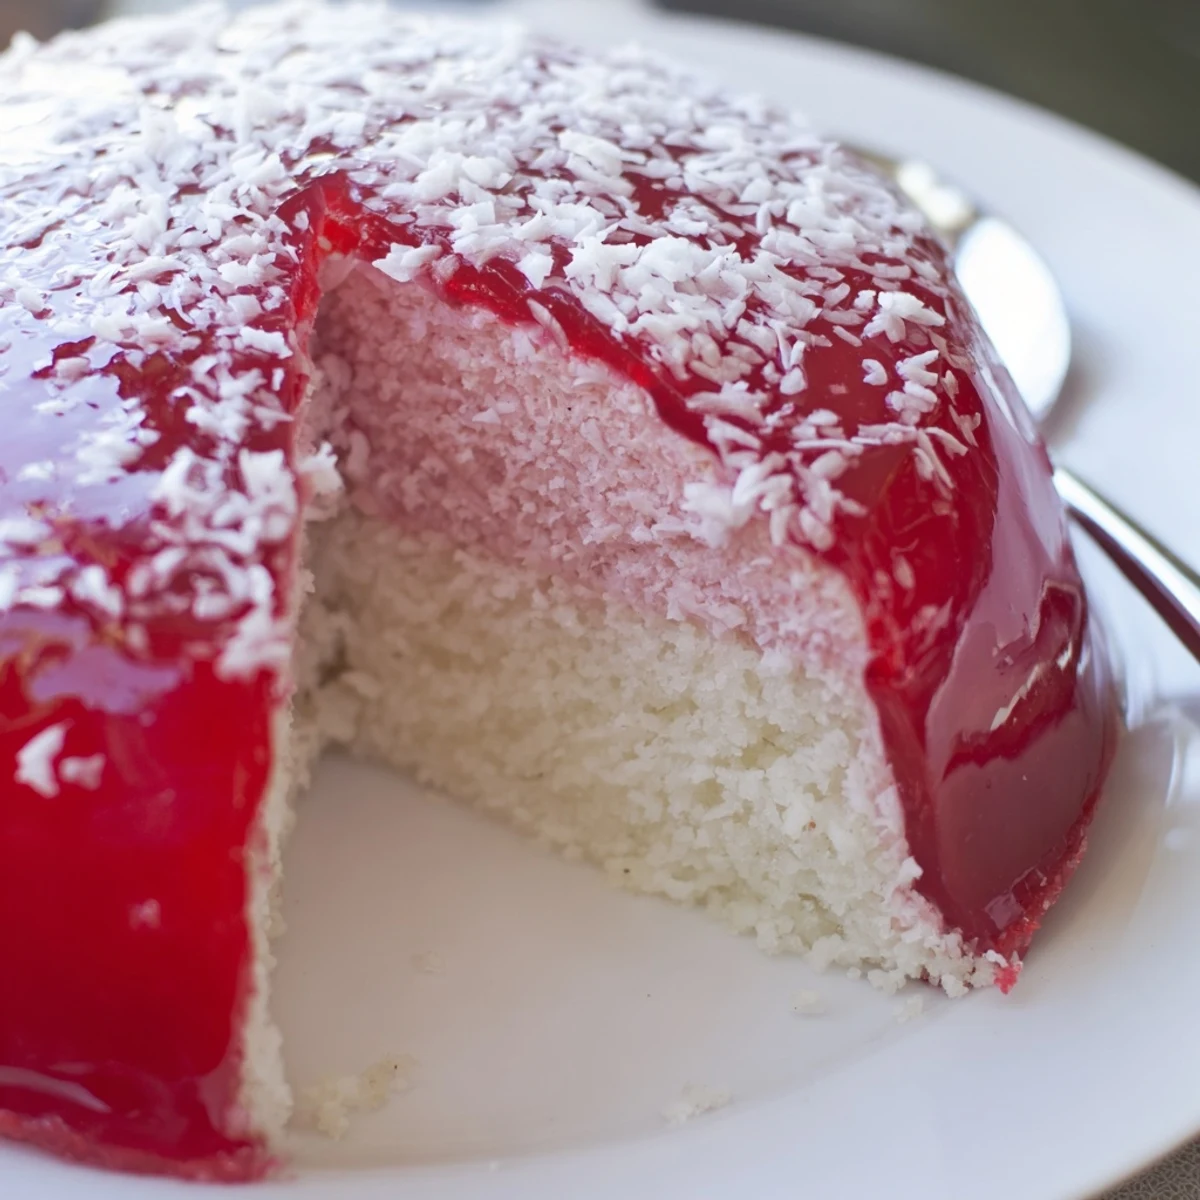
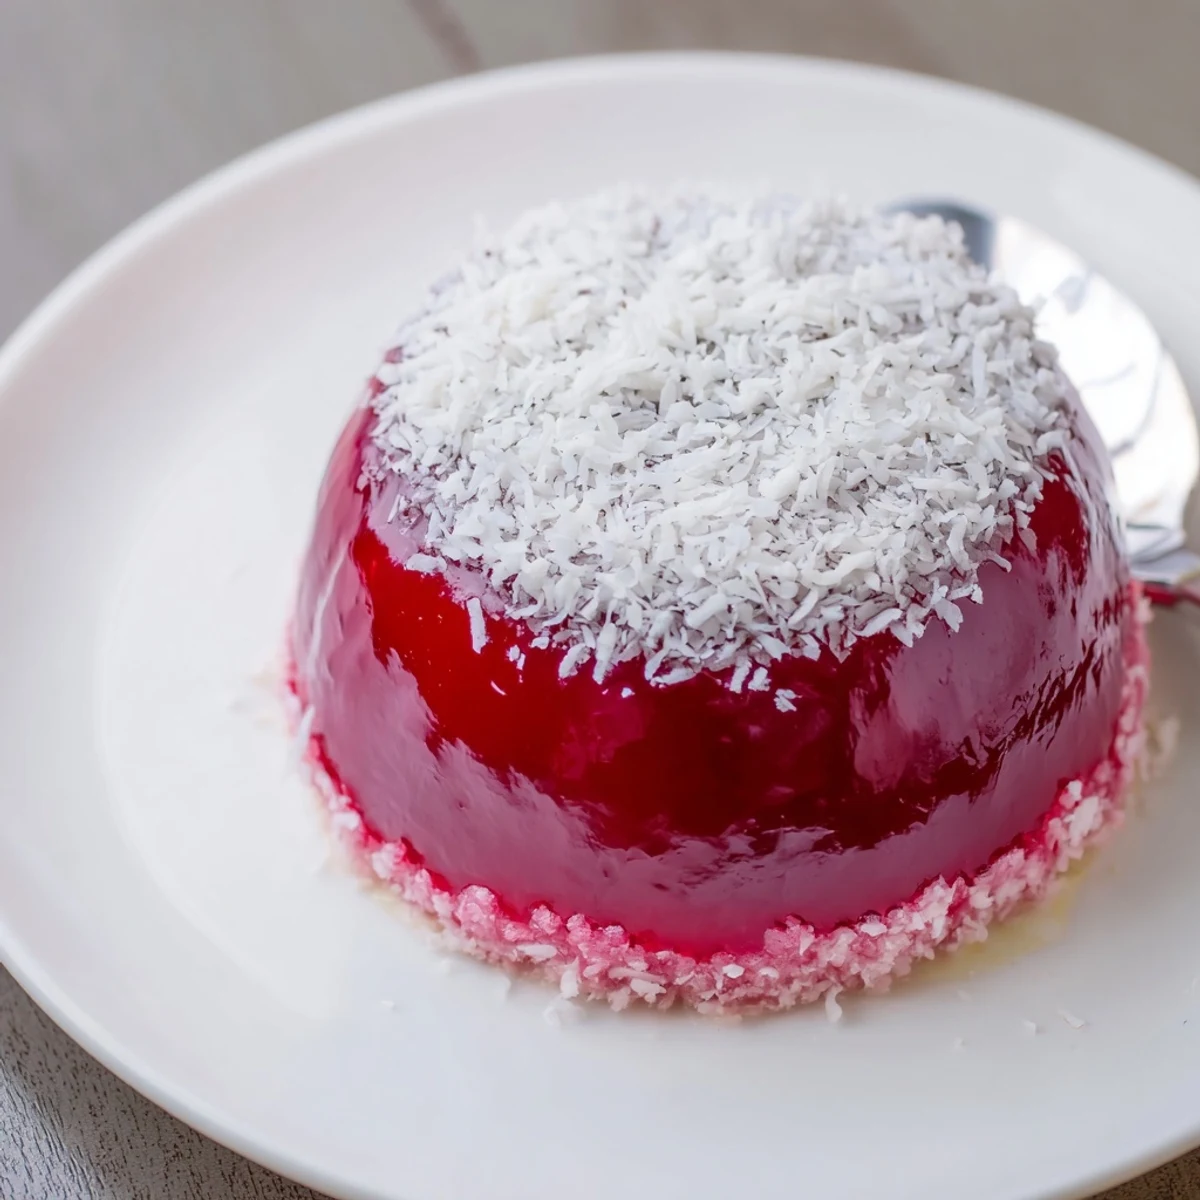
 These old fashioned pink jelly cakes start with a soft, buttery sheet sponge baked and cooled, then cut into 24 squares. Whip thickened cream with a little icing sugar and vanilla, sandwich the squares, dip each pair into semi-set raspberry jelly so it glazes evenly, and roll in desiccated coconut. Chill briefly to set; allow about 2 hours total including the jelly chilling time.
The kitchen smelled like a suburban bakery on a Saturday afternoon in 1994, my nan hovering over a tray of little pink cakes dusted in coconut like tiny snow capped treasures. She never called them anything fancy, just jelly cakes, and she made them for every church fundraiser and birthday afternoon tea for as long as I can remember. Something about the way the jelly soaked into the sponge, making everything soft and jewel bright, felt like edible magic. I finally asked her for the recipe when I turned twenty five and she handed it to me on a ruled notepad page stained with raspberry fingerprints.
I brought a batch to a potluck once and a woman grabbed my arm and said these are exactly what my mother used to make, her voice cracking a little, and I realised food does that, transports people sideways into feelings they forgot they had.
Ingredients
- Unsalted butter (125 g, softened): The foundation of the sponge, and you really do need it at room temperature or the batter will seize and look curdled.
- Caster sugar (125 g): Finer than regular sugar so it creams smoothly into the butter without leaving gritty pockets.
- Large eggs (2): Add them one at a time and beat well after each to keep the mixture emulsified and light.
- Vanilla extract (1 tsp): Use real extract, not imitation, because the sponge is delicate and every flavour shows.
- Self-raising flour (180 g, sifted): Sifting matters here, it incorporates air that the sponge desperately needs to stay soft rather than brickish.
- Milk (100 ml): Full fat milk gives the best crumb but any milk works in a pinch.
- Raspberry or strawberry jelly crystals (1 packet, 85 g): This is what gives the cakes their iconic pink blush and fruity sweetness.
- Boiling water (250 ml): Dissolves the jelly crystals completely so you do not end up with gritty patches.
- Cold water (150 ml): Brings the temperature down fast so you can get the jelly into the fridge sooner.
- Thickened cream (200 ml): Whips to firm peaks and holds its shape inside the cakes without weeping.
- Icing sugar (1 tbsp): Just enough to sweeten the cream without overpowering it.
- Vanilla extract (1/2 tsp, for cream): A whisper of vanilla in the filling rounds everything out beautifully.
- Desiccated coconut (100 g): Toast it lightly if you want a nuttier depth, or leave it raw for the classic snowy look.
Instructions
- Get the oven ready:
- Preheat to 180 degrees Celsius and grease your baking tin, lining the base with paper so the sponge releases cleanly without tearing.
- Beat butter and sugar until fluffy:
- Cream them together until the mixture turns pale and almost whipped looking, about three to four minutes with an electric mixer, scraping down the bowl once or twice.
- Add eggs and vanilla:
- Drop in one egg at a time, beating between each until fully incorporated, then pour in the vanilla and give it a final few seconds of mixing until the batter looks silky.
- Fold in flour and milk:
- Alternate adding sifted flour and milk in three additions, folding gently with a large spoon or spatula so you do not knock out the air you just worked hard to create.
- Bake the sponge:
- Spread the batter evenly in the tin and bake twelve to fifteen minutes until the top springs back lightly and a skewer inserted in the centre comes out clean.
- Cool and prepare the jelly:
- Let the sponge cool ten minutes in the tin before turning it onto a wire rack, and while that happens dissolve the jelly crystals in boiling water, stir in cold water, pour into a shallow dish, and refrigerate until it just begins to set around the edges.
- Cut and fill:
- Cut the cooled sponge into twenty four even squares, whip the cream with icing sugar and vanilla to firm peaks, and sandwich pairs of sponge together with a generous spoonful.
- Dip and roll:
- Working quickly, dip each sandwiched cake into the semi set jelly to coat all sides, let the excess drip off for a second, then roll immediately in coconut and set on a wire rack to firm up in the fridge for thirty minutes.
 Save to Pinterest
 I once dropped an entire tray of these on the way to a friend's barbecue and we scooped the broken pieces into bowls and ate them with spoons, still incredible, which told me the flavour does not depend on perfection.
Storage and Timing
Jelly cakes are at their absolute best within a few hours of being made, when the sponge has absorbed just enough moisture from the jelly to become soft but not collapsing. If you need to make them ahead, prepare the sponge the day before and store it wrapped in the fridge, then do the jelly dipping and coconut rolling on the day you plan to serve them. They will keep in the refrigerator for about a day but the coconut gets damp and the sponge becomes overly soft after that. They are truly a same day treat, which is part of their charm really.
Flavor Variations Worth Trying
Raspberry is the traditional choice and the one most people remember from childhood but passionfruit jelly gives them a tropical sharpness that cuts through the cream beautifully. Orange jelly works too, especially in winter when you want something brighter and less purely sweet. I once used lime jelly on a whim and while the colour was a little strange, the flavour was unexpectedly refreshing with the coconut. You could also split the cream filling and fold through a little lemon curd for a tart surprise in the middle.
Tools and Common Mistakes
You do not need much equipment but an electric mixer makes creaming the butter and sugar infinitely easier and gives a lighter sponge than doing it by hand. A shallow dish for the jelly is essential because you need to be able to submerge the cakes quickly and evenly without them sitting in a deep pool of liquid. A wire rack for the final set is non negotiable, if you put them on a plate the bottoms will stick and you will lose half the coconut when you peel them off.
- Use a serrated knife to cut the sponge squares, it gives cleaner edges without compressing the crumb.
- Keep a sheet of baking paper under the wire rack to catch dripping jelly and loose coconut for easier cleanup.
- Taste the jelly before you start dipping, some brands are significantly sweeter or more tart than others.
 Save to Pinterest
 These little cakes are messy and fiddly and you will get pink jelly on your hands and coconut on your floor but that is exactly how it should be, and when someone bites into one and goes quiet for a moment you will know it was worth every bit of it.
