 Save to Pinterest
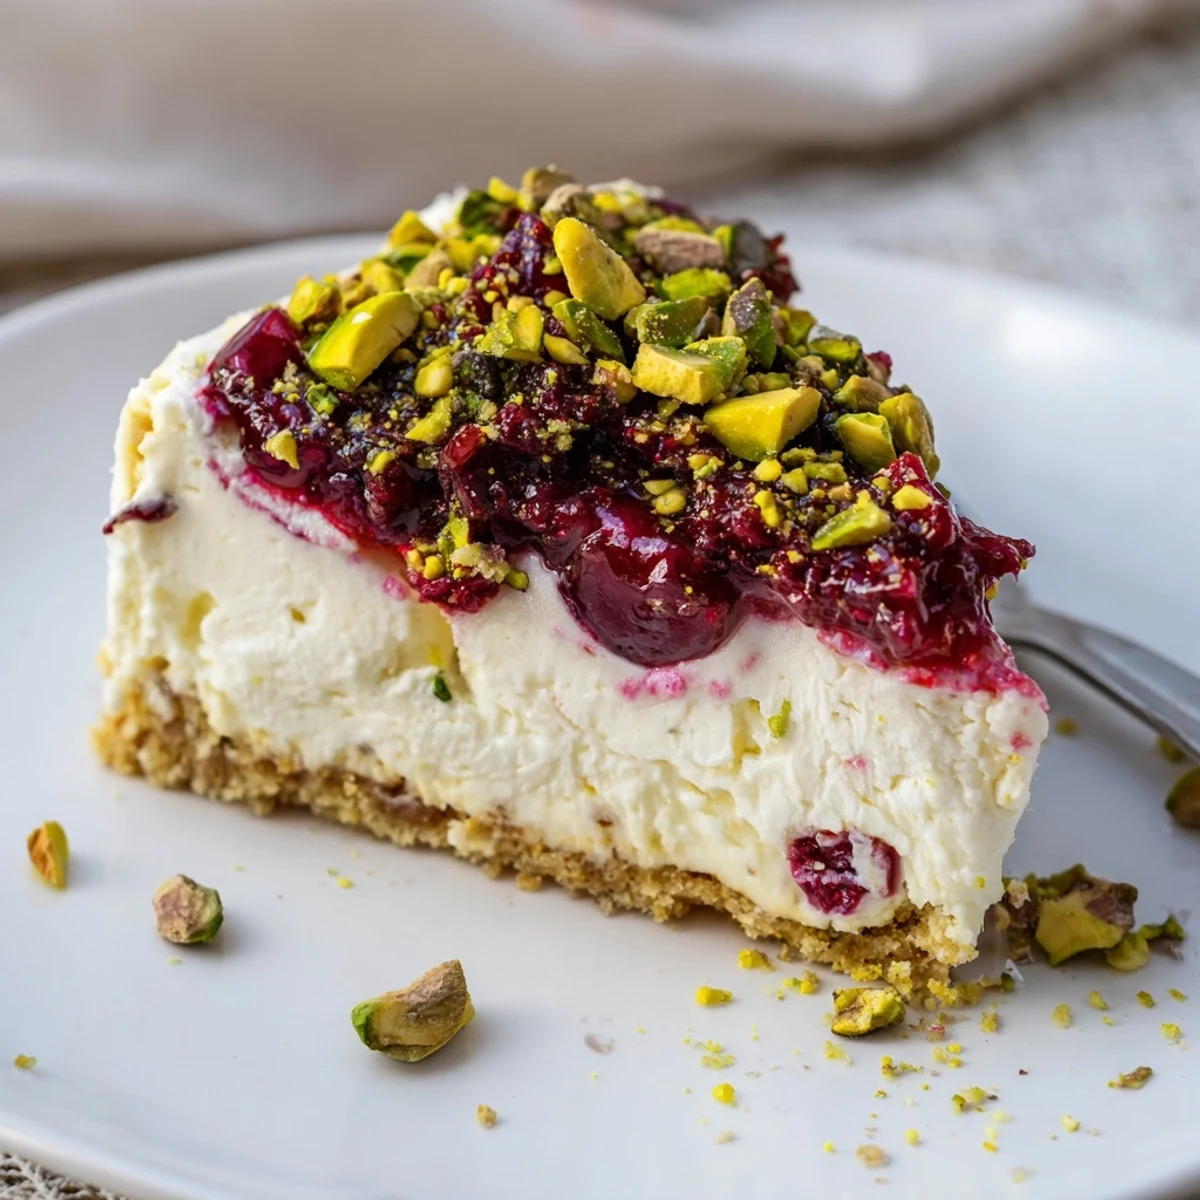
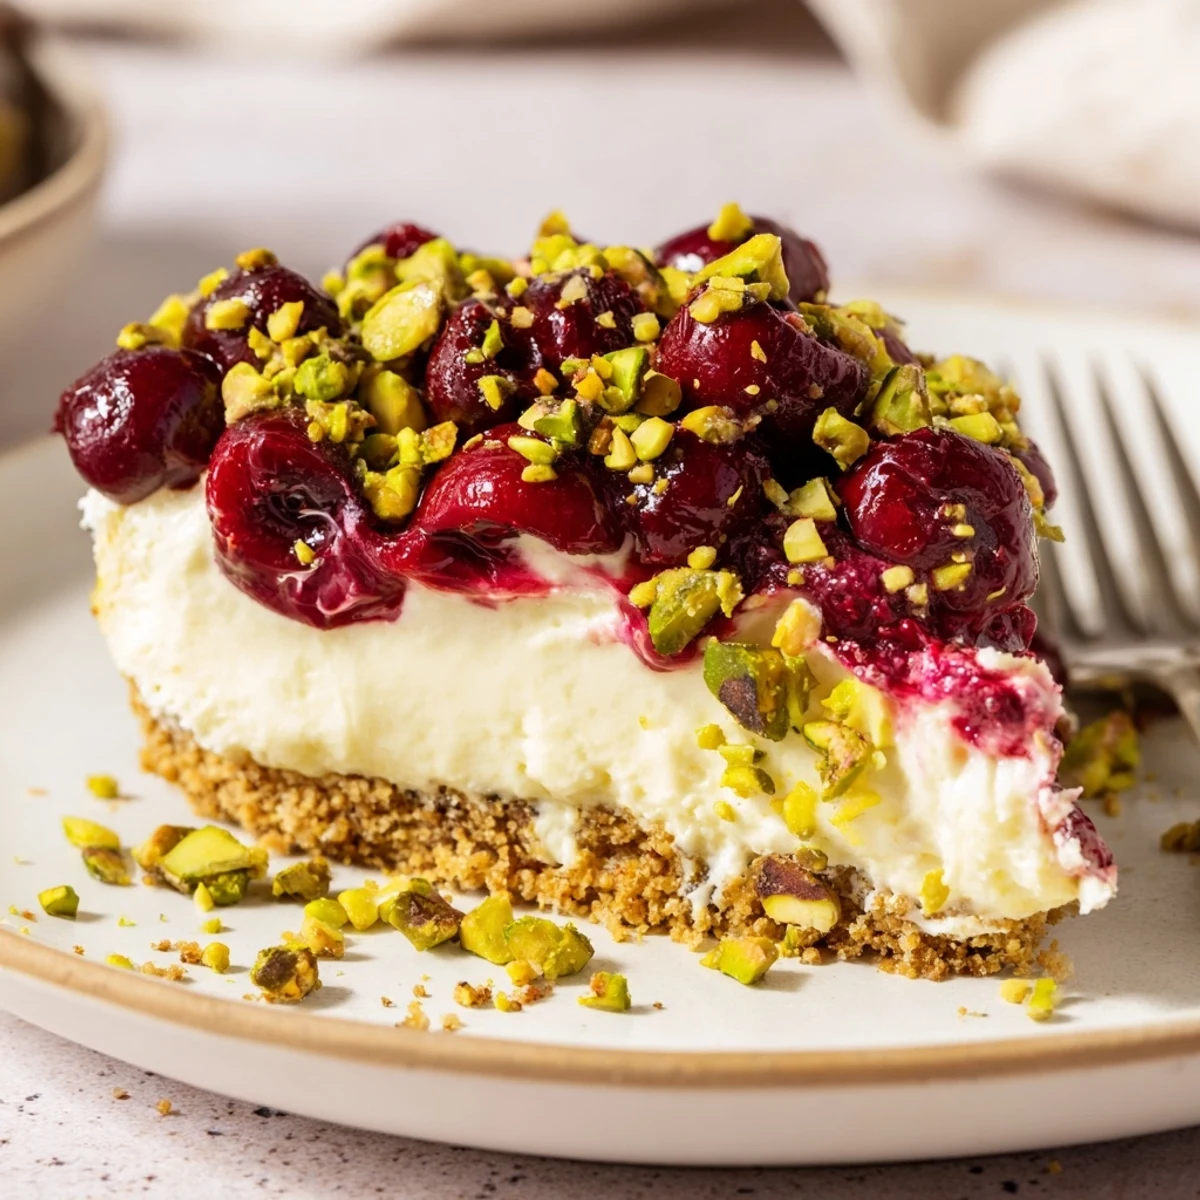
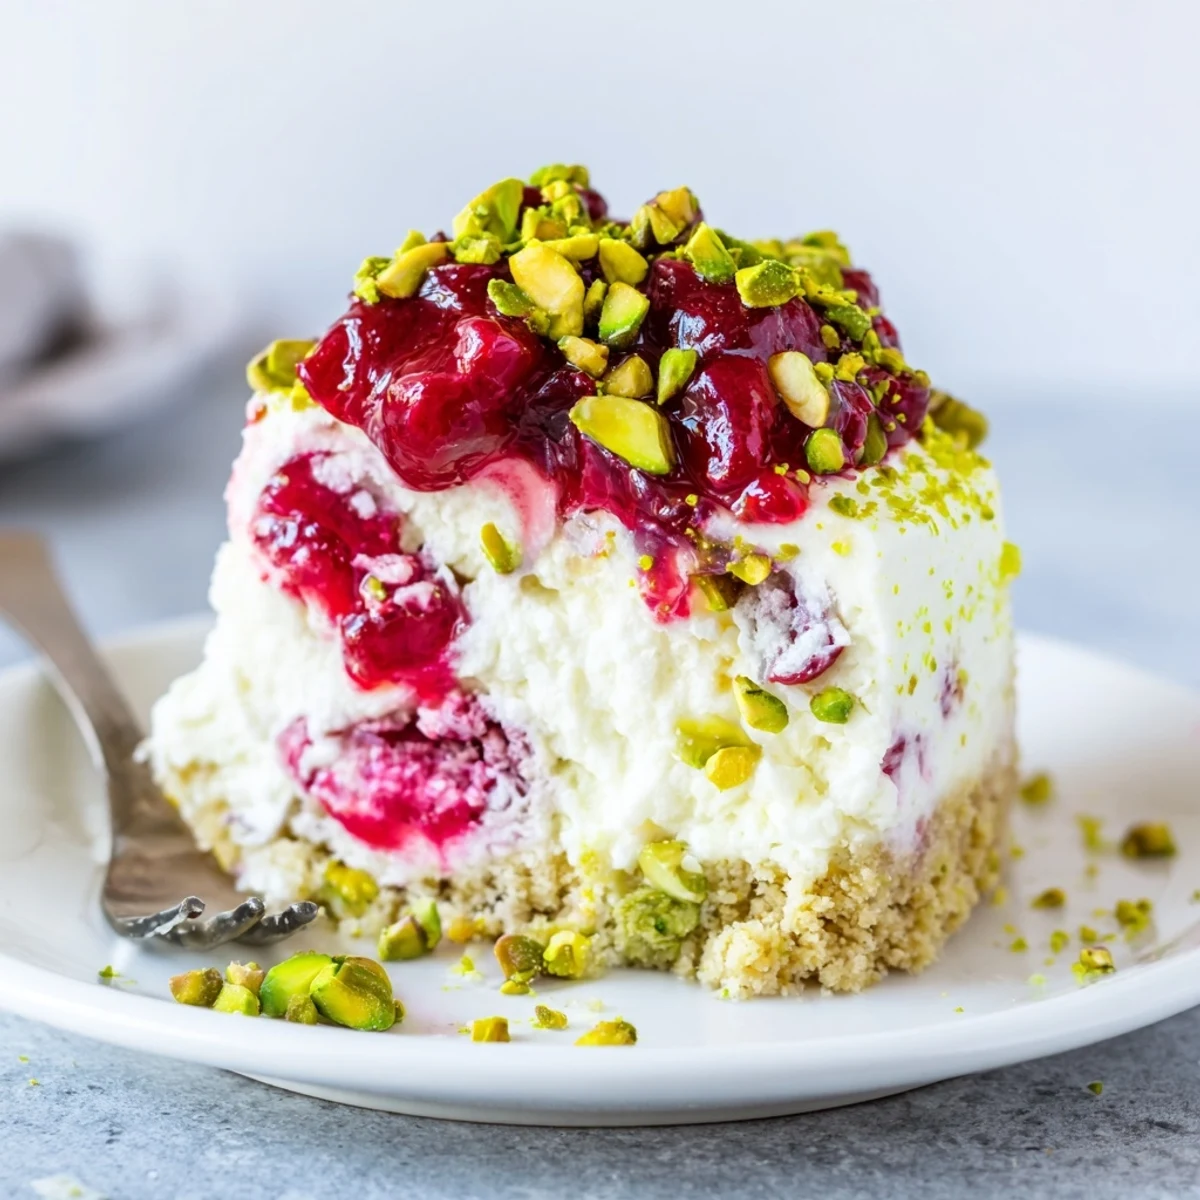
 This lemon-lime cherry pistachio cheesecake pairs a buttery graham crust with a smooth cream cheese filling enlivened by lemon and lime zest and juices, and studded with chopped pistachios for texture. Bake until the center is just set, cool in the pan, then chill thoroughly for clean slices. Finish with a quick stovetop cherry compote for glossy, tart-sweet contrast that brightens each bite.
The first time I made this Lemon Lime Cherry Pistachio Cheesecake, the tart aroma of citrus hit me before I’d even cracked an egg. After a hectic week, the act of zesting lemons and limes felt almost meditative, and terribly satisfying. Watching the vivid colors tumble together in the bowl, I found myself unexpectedly excited just to see how it would all taste in the end. Bright, tangy cherries and a nutty pistachio crust felt like just the thing for shaking off winter blues.
One warm afternoon, I surprised my friends with this cheesecake after a lakeside picnic, totally winging the cherry topping with whatever we had. Nobody could believe it was homemade, and someone actually asked if I’d smuggled it in from a fancy bakery down the street. There was laughter, cherry juice on shirts, and declarations that this would be my “signature dessert” from now on.
Ingredients
- Graham crackers or digestive biscuits (200 g): Choosing the right base is crucial: I prefer digestives for a slightly maltier touch, but any sturdy biscuit does the job—just make sure they’re finely crushed for a compact crust.
- Unsalted butter (60 g), melted: Melted butter soaks into the crumbs, binding everything perfectly and giving each bite that golden, toasty flavor.
- Shelled pistachios, finely chopped (2 tbsp, plus 100 g for filling): Pistachios add both crunch and a subtle earthiness; if you can, toast them lightly for even more flavor.
- Sugar (2 tbsp for crust, 200 g for filling, 80 g for cherries): Layered sweetness brightens the cake without masking the tang of cherries and citrus—taste the cherry mix as it cooks to judge your own ideal amount.
- Cream cheese (700 g), room temperature: Room temp cream cheese is essential for that dreamy smoothness—otherwise, you risk lumps in your batter, so be patient here.
- Large eggs (3): Add them one at a time and mix gently to avoid overworking; too much speed makes for a denser cake and more cracks.
- Sour cream (200 ml): It softens the texture and underlines the citrus note with its subtle tang, so don’t skip it.
- Zest and juice of 1 lemon and 1 lime (plus 2 tbsp juice each): Zest first, then juice—they add a double layer of brightness you honestly can’t fake with bottled alternatives.
- Vanilla extract (1 tsp): Just a splash brings out all the other flavors and grounds the tartness with gentle warmth.
- Cherries (350 g, fresh or frozen): I often use frozen when fresh aren’t in season; just simmer them a touch longer to thicken the topping.
- Lemon juice (1 tbsp for topping): This bit sharpens the cherry flavor so it isn’t cloying.
- Cornstarch (1 tbsp): Dissolved in a splash of water, this magically transforms the topping into luscious ruby gloss.
- Water (2 tbsp): Needed to activate the cornstarch for the topping—don’t be tempted to skip or the sauce won’t set.
Instructions
- Warm up the kitchen:
- Preheat your oven to 170°C (340°F) and let the hum of the oven create that comforting, bakery-like warmth.
- Build the base:
- Mix your crushed biscuits, melted butter, sugar, and finely chopped pistachios until every crumb glistens. Press into a 23 cm springform pan, making sure it’s even, then bake for 10 minutes and inhale—the start of something good.
- Whip up the filling:
- Beat the cream cheese and sugar until completely smooth and fluffy—resist licking the beaters for just a minute longer.
- Add eggs and flavor:
- Mix in the eggs one by one, then fold in the sour cream, citrus zest, juices, vanilla, and brimming handfuls of chopped pistachios; pause to appreciate the colorful flecks.
- Pour and smooth:
- Spread the filling onto your cooled crust in gentle waves, tapping out any pesky air bubbles for that show-worthy surface.
- Bake to perfection:
- Bake for about an hour, checking that the edges are set while the center still trembles a little—like a well-made custard.
- Chill out:
- Run a knife around the edges, cool completely, and chill for at least 4 hours (or overnight if you can wait)—the anticipation is part of the treat.
- Cherry on top:
- Simmer cherries, sugar, and lemon juice until juicy, then stir in cornstarch dissolved in water until thickened and glossy. Cool the mixture before generously spooning over the set cheesecake and, if you’re feeling fancy, sprinkle with a few extra pistachios.
- Serve and celebrate:
- Release from the pan, slice into creamy wedges, and serve chilled, ready for oohs and ahhs.
 Save to Pinterest
 It was only after someone shyly asked me for a second slice that I realized how much joy a really good cheesecake brings to a table. Somehow, the combination of bright flavors and a cheerful presentation turned dessert into the highlight of the evening.
Getting the Best Citrus Flavor
Fresh zest is your flavor powerhouse here, far more intense than bottled juice. Rubbing the zest directly over the batter let me smell the perfume bloom in the air. I always zest directly over the bowl, so all the essential oils fall right in. Pro tip: a light microplane makes you less likely to scrape the bitter white pith.
Mastering Cherry Topping
A glossy cherry crown sets off the creamy filling and seems to wow guests every time. If your cherries are particularly tart, adjust the sugar to taste but don’t overdo it—a lively sharpness balances the rich cake. Thaw frozen cherries well and simmer longer to reduce extra juice and avoid a watery topping. Let the topping cool completely before adding for a neat finish.
When Pistachios Steal the Spotlight
There’s a reason pistachios make this cheesecake special: their crunch cuts through all that lush creaminess and surprises everyone with earthiness. Sometimes I pulse half for finer texture and leave the rest chunky for contrast. It’s a small change, but makes each bite pop.
- Sprinkle a few chopped pistachios on top of the cherries right before serving for the prettiest color contrast.
- If allergens are a concern, toasted almonds work just as beautifully and change the character completely.
- Always line the pan base with parchment if you want the cheesecake to lift out cleanly.
 Save to Pinterest
 May your kitchen fill with laughter as the aromas of citrus and cherry drift around you—this is the kind of dessert that really makes memories. Enjoy each slice slowly, letting the zesty notes and nutty crunch linger just a little longer.
Recipe FAQs
- → How do I prevent cracks in the cheesecake?
-
Bake at moderate temperature and avoid overbeating the batter. Remove from the oven when the center is just set and allow the cake to cool gradually in the pan before chilling; this reduces temperature shock and minimizes cracks.
- → Can I make the crust gluten-free?
-
Yes. Swap graham crackers or digestive biscuits for a certified gluten-free biscuit or crushed gluten-free cookies. Keep the butter ratio the same to achieve the proper texture when pressing the crust into the pan.
- → What’s the best way to prepare the cherry topping?
-
Simmer fresh or frozen pitted cherries with sugar and a splash of lemon juice until they release their juices. Stir in a cornstarch slurry, simmer until thickened, then cool completely before spooning over the chilled cake for a glossy finish.
- → Can I substitute pistachios with another nut?
-
Yes. Almonds or toasted hazelnuts work well if you prefer a different flavor or texture. Toast the nuts lightly to enhance their aroma, and chop them to match the crunchy contrast intended in the filling and garnish.
- → How far ahead can this be made?
-
It benefits from making a day ahead. Bake and chill the cheesecake overnight for the best texture, then add the cherry topping just before serving to keep it bright and glossy.
- → How do I know when the cheesecake is done?
-
The edges should be set while the center remains slightly wobbly when gently shaken. The center will firm up during cooling and chilling; avoid baking until fully rigid to keep a creamy interior.
