 Save to Pinterest
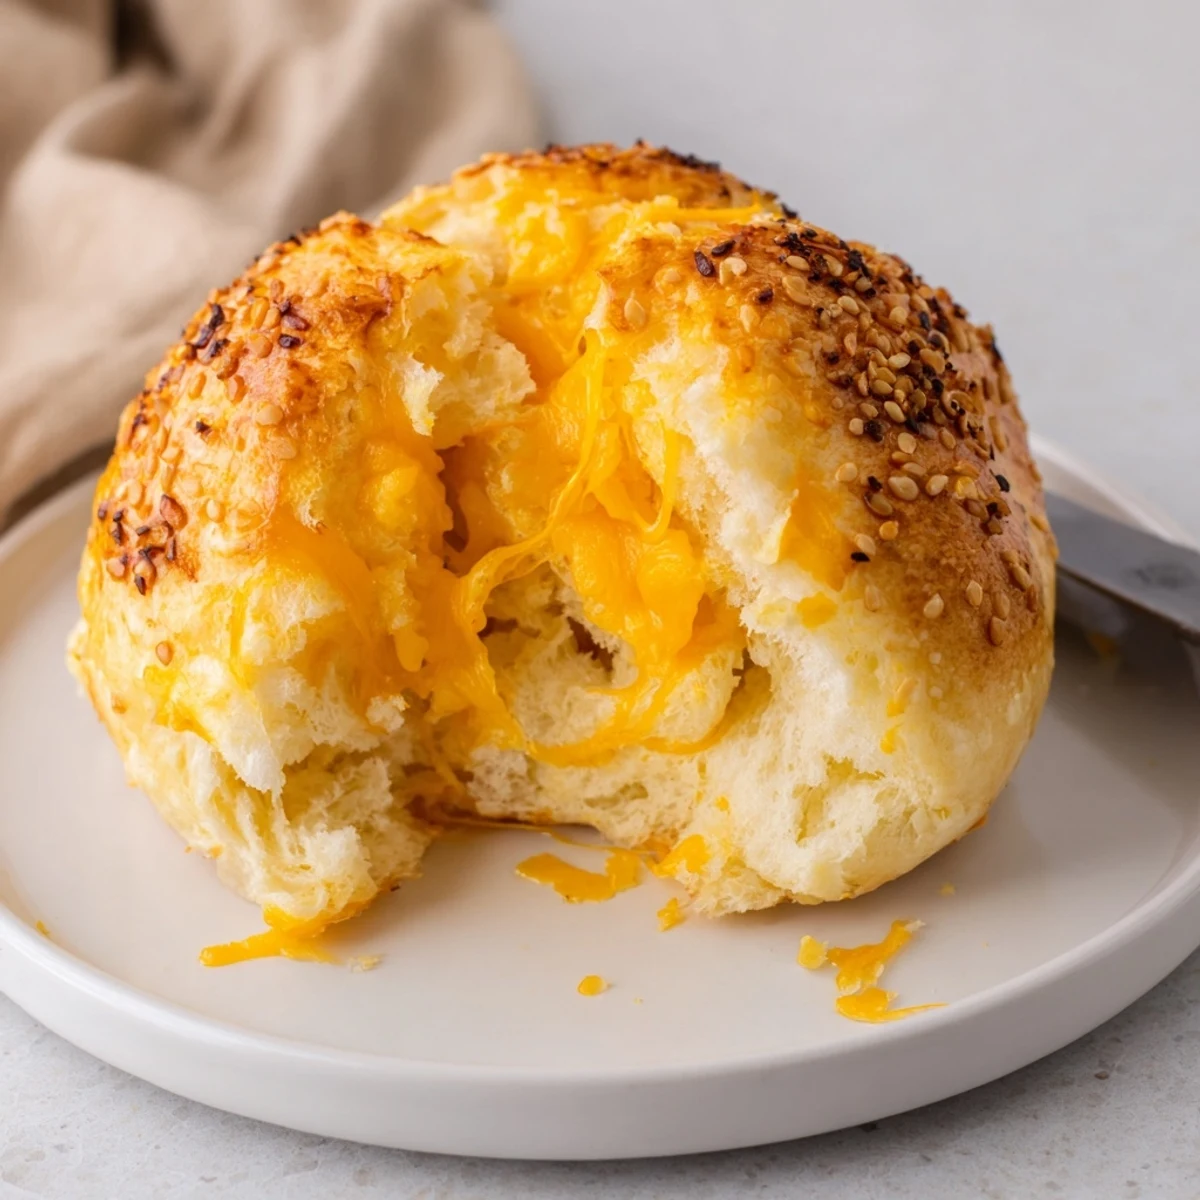
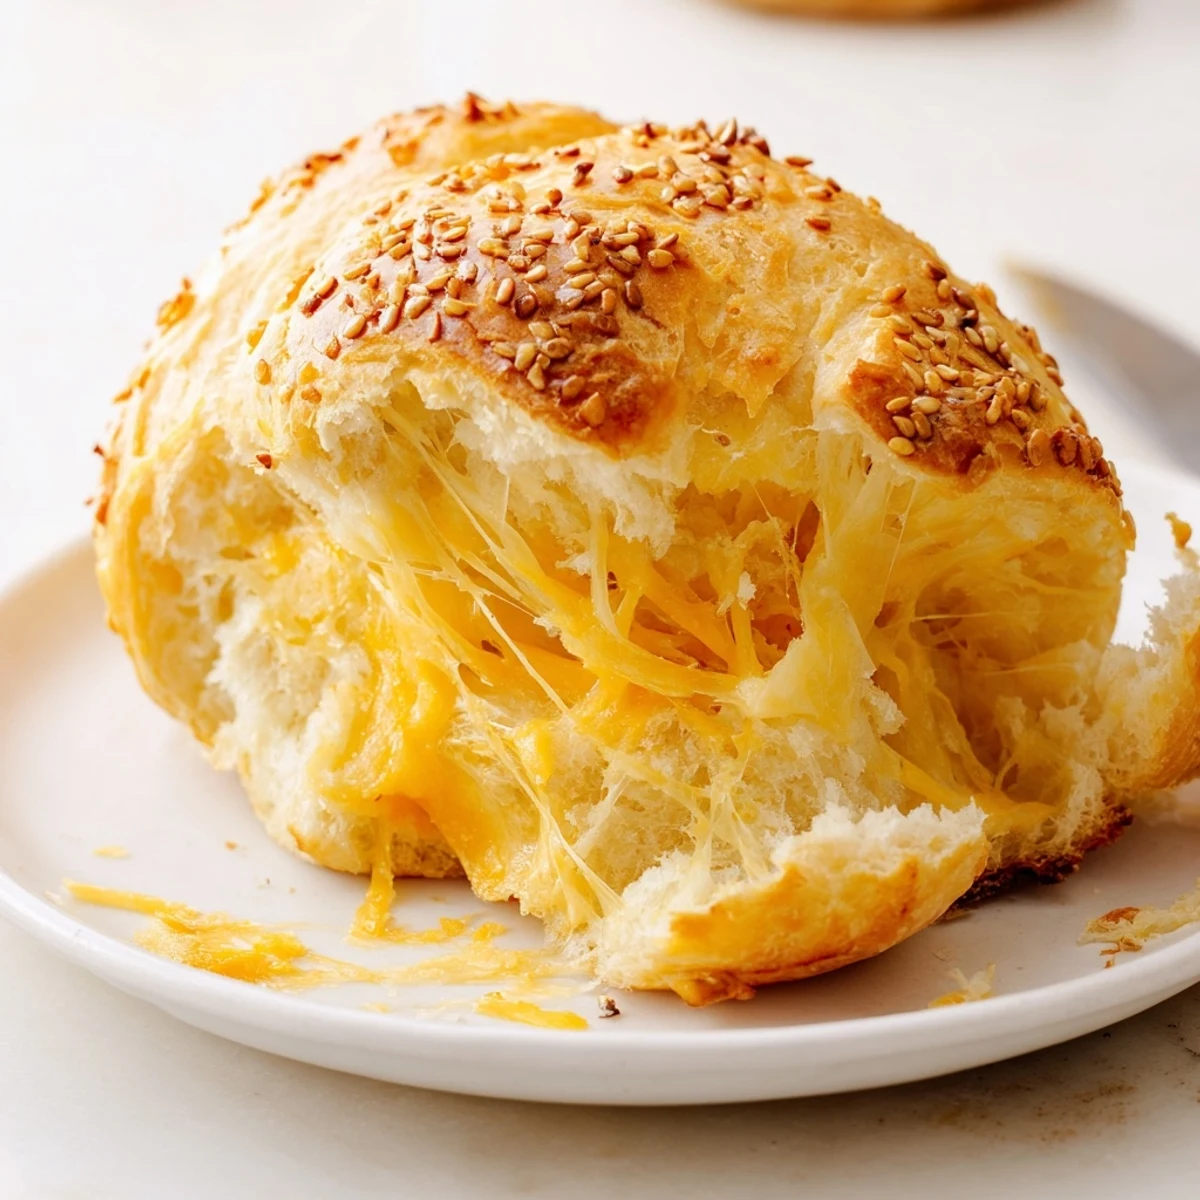
 Start by proofing yeast in warm milk and water with sugar, then stir in flour, salt, softened butter and egg to form a soft dough. Knead until smooth and elastic, fold in most of the grated sharp Cheddar, let rise until doubled, shape into eight buns, top with remaining cheese and seeds, and bake at 375°F until golden and bubbly. Brush with milk and cool briefly before serving warm.
The smell of melted sharp Cheddar hitting hot dough is something that rewires your brain a little. My neighbor Jill once knocked on my door at ten in the morning just to ask what was baking because the scent had drifted through her open kitchen window. I handed her a bun still warm from the oven and she stood in my doorway eating the whole thing without saying another word. That silence was the best compliment I have ever received.
I started making these on rainy Saturday mornings when my kids were small and needed a project that involved flour covered hands and patient waiting. We would sit on the kitchen floor playing cards while the dough rose in its bowl on top of the warm stove. The second rise always tested their patience but the reward was eight golden buns that disappeared before lunchtime.
Ingredients
- All purpose flour (3 cups, 375 g): Regular unbleached flour works perfectly here so do not overthink it.
- Active dry yeast (2 1/4 tsp, 7 g): One standard packet and check the expiration date because tired yeast will break your heart.
- Sugar (2 tbsp, 25 g): Just enough to wake up the yeast without making the buns sweet.
- Salt (1 tsp): Essential for balancing the cheese and bringing out depth in the dough.
- Warm milk (3/4 cup, 180 ml): Aim for bathwater temperature around 110 degrees Fahrenheit because too hot will kill the yeast instantly.
- Warm water (1/4 cup, 60 ml): Combined with the milk to create the right liquid ratio for a soft tender crumb.
- Unsalted butter (1/4 cup, 60 g): Softened so it incorporates smoothly and adds richness without overpowering the cheese.
- Large egg (1): Gives the dough structure and a slight tenderness that makes these feel bakery quality.
- Sharp Cheddar cheese (1 3/4 cups, 175 g grated): Use the sharpest you can find because a mild cheese will disappear into the background.
- Milk for brushing (1 tbsp): A quick brush before baking gives the tops a beautiful golden shine.
- Sesame or poppy seeds (1 tbsp, optional): Adds a subtle crunch and visual appeal but totally optional.
Instructions
- Wake up the yeast:
- Pour warm water, warm milk, sugar, and yeast into a large bowl and stir gently then wait five minutes until the surface looks frothy and alive. If nothing happens your yeast is dead and you need to start over.
- Build the dough:
- Add the flour, salt, softened butter, and egg to the foamy yeast mixture then stir with a wooden spoon until everything comes together into a shaggy soft mass. It will look messy at first but trust the process.
- Knead until smooth:
- Turn the dough onto a floured counter and knead with the heels of your hands for eight to ten minutes until it feels silky and springs back when you poke it gently. This is where the magic texture happens so do not rush it.
- First rise:
- Place the dough in a greased bowl, cover it with a damp towel or plastic wrap, and tuck it somewhere warm for about sixty minutes until it has puffed up to double its size. The inside of a turned off oven with the light on works beautifully.
- Preheat and prep:
- Turn your oven to 375 degrees Fahrenheit and line a baking sheet with parchment paper so the cheese does not weld itself to the pan.
- Fold in the cheese:
- Punch down the risen dough, turn it out onto your floured surface, and knead in one and a quarter cups of the grated Cheddar until it is distributed evenly throughout. Some pieces will try to escape and that is perfectly fine.
- Shape the buns:
- Divide the dough into eight equal pieces and roll each one into a smooth round bun then arrange them on the prepared baking sheet with space between them for spreading. Sprinkle the remaining cheese and optional seeds over the tops generously.
- Second rise:
- Cover the shaped buns loosely and let them puff up for twenty to thirty minutes until they look noticeably plumper and soft. This shorter rise keeps them light rather than dense.
- Brush and bake:
- Brush the tops lightly with milk then slide the tray into the hot oven and bake for eighteen to twenty minutes until the cheese is bubbling and the bun tops are deeply golden. Your kitchen will smell unbelievable at this point.
- Cool and serve:
- Let them rest on the pan for five minutes so the molten cheese inside can settle slightly then serve warm or at room temperature. They are best eaten the day they are made.
 Save to Pinterest
 There is something about pulling a tray of golden cheese buns from the oven that makes everyone in the house appear in the kitchen at the exact same time. My brother in law once ate four of them standing up with butter running down his chin before dinner was even ready. Food does not need to be complicated to become a memory people carry with them.
Cheese Swaps Worth Trying
Sharp Cheddar is the classic choice but Gruyere melts into these beautiful stretchy pockets that feel almost fondue like inside the bun. Pepper Jack adds a low building heat that pairs surprisingly well with a smear of honey butter on top.
Mix In Ideas for Extra Flavor
Chopped fresh chives folded in with the cheese add a mild onion brightness that cuts through the richness perfectly. Crispy cooked bacon crumbles turn these into something close to a complete meal wrapped inside a bread roll.
Storing and Reheating
These buns are at their absolute peak within two hours of baking but they store well in an airtight container at room temperature for up to two days. A ten second spin in the microwave brings back enough warmth and softness to make them feel nearly fresh baked again. For longer storage wrap them individually and freeze for up to one month then thaw and reheat when the cheese bun craving hits unexpectedly.
- Never refrigerate baked buns because the cold dries them out and makes the cheese texture grainy.
- If freezing, wrap each bun tightly in foil first then place in a freezer bag to prevent freezer burn.
- Always reheat gently because blasting them too long in the microwave turns the centers tough and rubbery.
 Save to Pinterest
 Keep these in your back pocket for potlucks, soup nights, or just a weekend when you want your house to smell incredible and your people to feel taken care of. Sometimes eight little cheese buns are all you need to make an ordinary day feel special.
Recipe FAQs
- → How do I keep the buns soft after baking?
-
Brushing with milk before baking helps the crust brown, and storing buns in an airtight container while still slightly warm preserves moisture. Reheat briefly in a low oven or microwave with a damp paper towel to revive softness.
- → Which cheeses work well as substitutes for sharp Cheddar?
-
Gruyère and Pepper Jack are great swaps for different flavor profiles; mozzarella will give stretch but milder taste. Adjust salt levels if using a salty aged cheese.
- → Can I make the dough ahead of time?
-
Yes. After kneading, chill the dough in the refrigerator for an overnight cold ferment (up to 24 hours). Bring it back to room temperature, let it finish rising, then shape and bake as directed.
- → What causes dense buns and how can I avoid it?
-
Dense buns usually come from underproofing, using water that's too hot or cold, or insufficient kneading. Proof yeast in warm (not hot) liquid, knead until elastic, and wait until the dough doubles before shaping.
- → Is freezing an option and how should I do it?
-
You can freeze shaped, unbaked buns on a tray, then transfer to a bag for up to 3 months. Bake from frozen, adding a few minutes to the bake time. Baked buns can also be frozen and reheated in a warm oven.
- → What toppings or mix-ins enhance the flavor?
-
Extra grated cheese on top crisps nicely; sesame or poppy seeds add texture. Stirred-in chives, cooked bacon, or a sprinkle of smoked paprika provide savory depth.
